创建程序 注意事项
创建Qt程序需要选择模板,选择Application下的Qt Widgets Application即可。这是一个桌面Qt应用,包含一个基于Qt设计师的主窗体。
项目命名时不能出现空格、汉字等,可以由数字、英文、下划线组成。
路径中也不能有中文,否则可以正常创建,但不能运行。
创建项目时需要创建一个类作为主窗体,这个类的基类有三种选择:QWidget,QMainWindow,QDialog,第一种是剩下两种的父类。QWidget是最简单的一个窗口,QMainWindow多了菜单栏,工具栏,状态栏等,QDialog是对话框类,一般没有最大化和最小化的按钮,有一些让用户进行选择的按钮。
组成代码 主文件 创建项目后,得到的main.cpp文件如下所示:
1 2 3 4 5 6 7 8 9 10 11 12 13 14 15 16 17 18 19 20 #include "widget.h" #include <QApplication> int main (int argc, char *argv[]) QApplication a (argc, argv) ; Widget w; w.show (); return a.exec (); }
pro文件 pro文件如下所示:
1 2 3 4 5 6 7 8 9 10 11 12 13 14 15 16 17 18 19 20 21 22 23 24 25 26 QT += core gui greaterThan(QT_MAJOR_VERSION, 4): QT += widgets CONFIG += c++17 SOURCES += \ main.cpp \ widget.cpp HEADERS += \ widget.h qnx : target.path = /tmp/$${TARGET}/bin else : unix:!android: target.path = /opt/$${TARGET}/bin
头文件 头文件代码如下所示:
1 2 3 4 5 6 7 8 9 10 11 12 13 14 15 16 17 18 19 20 #include "widget.h" #include <QApplication> int main (int argc, char *argv[]) QApplication a (argc, argv) ; Widget w; w.show (); return a.exec (); }
源文件 源文件代码如下所示:
1 2 3 4 5 6 7 8 #include "widget.h" Widget::Widget (QWidget *parent) : QWidget (parent) {} Widget::~Widget () {}
头文件类的声明放在源文件中。
命名规范
类名:采用Pascal命名法,首字母大写,单词与单词之间首字母大写。
函数名 变量名称:采用驼峰命名法,首字母小写,单词与单词之间首字母大写。
快捷键
注释:ctrl + /
运行:ctrl + r
编译:ctrl + b
字体缩放:ctrl + 鼠标滚轮
查找:ctrl f
整行移动:ctrl + shift + ↑/↓
帮助文档:F1
自动对齐:ctrl + i
同名之间的.h和.cpp切换:F4
按钮 头文件 创建需要引入相关的头文件,与按钮有关的头文件是QPushButton,因此需要在窗口的代码中引用。
需要先进行实例化,使用指针指向一个开辟在堆区的按钮对象。
1 2 QPushButton * btn = new QPushButton;
设置父亲 可以使用show方法直接将按钮显示出来。
但我们希望按钮出现在窗口中,这种方法会导致按钮独立出来。为了实现我们的需求,可以设置一下这个按钮的Parent,让其依赖在窗体中。因为这个按钮是在窗口类中编写的,只需要将Parent设置为this即可。
添加文本 希望在这个按钮上添加一些文本信息,可以使用setText方法。
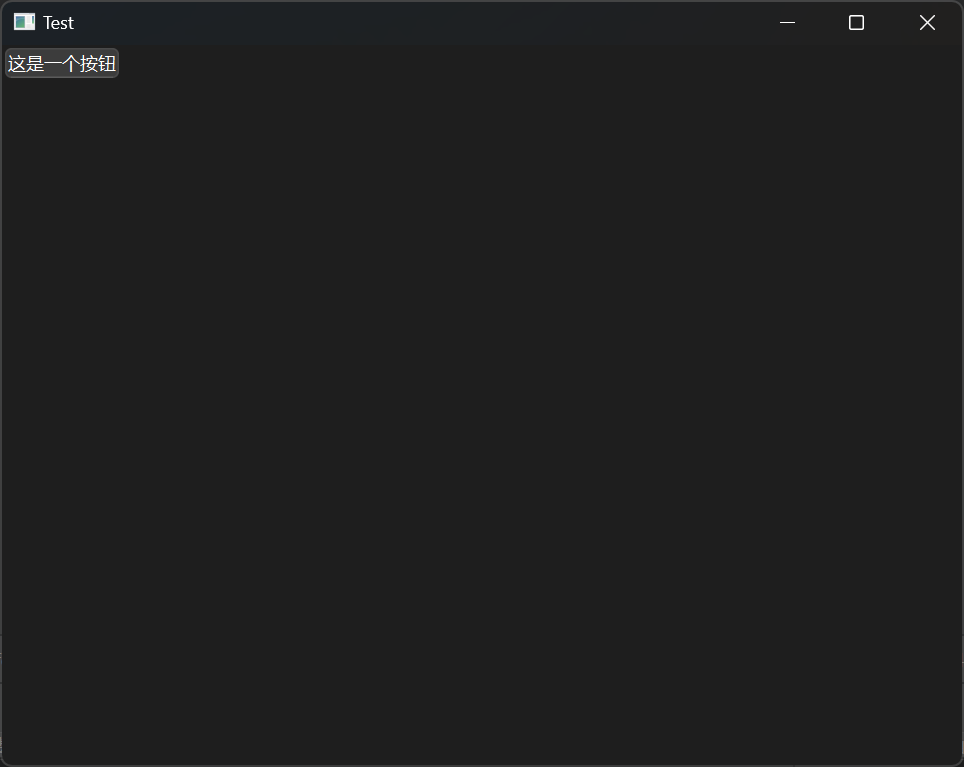
示例 通过上述方法,即可生成一个有按钮的窗口,完整代码:
1 2 3 4 5 6 7 8 9 10 11 12 13 14 15 16 17 18 19 20 21 22 #include "widget.h" #include <QPushButton> Widget::Widget (QWidget *parent) : QWidget (parent) { QPushButton * btn = new QPushButton; btn->setParent (this ); btn->setText ("这是一个按钮" ); } Widget::~Widget () {}
结果展示:
上述代码主要是设置了Parent和Text,这些内容都可以在创建时直接设置。
1 2 3 4 5 6 7 8 9 10 11 #include "widget.h" #include <QPushButton> Widget::Widget (QWidget *parent) : QWidget (parent) { QPushButton * btn = new QPushButton ("这是一个按钮" ,this ); } Widget::~Widget () {}
布局 重置窗口 使用有参构造的方式创建按钮有一个缺点,会改变窗口大小,默认按照控件的大小创建窗口。
因此可以增加一行代码来重置窗口大小,使用resize方法即可完成,传入的两个参数分别对应长和宽。
1 2 3 4 5 6 7 8 9 10 11 12 13 14 #include "widget.h" #include <QPushButton> Widget::Widget (QWidget *parent) : QWidget (parent) { QPushButton * btn = new QPushButton ("这是一个按钮" ,this ); resize (600 , 400 ); } Widget::~Widget () {}
移动 可以通过move方法对控件进行移动,只需要调用方法,并指定坐标即可。
设置标题 还可以设置窗口标题,需要调用setWindowTitle方法。
固定窗口 实际操作中发现,窗口可以随意拖动来控制大小,可以使用setFixedSize来固定窗口大小。
1 2 setFixedSize (600 , 400 );
不仅窗口可以重置大小,按钮也可以使用resize进行重置。
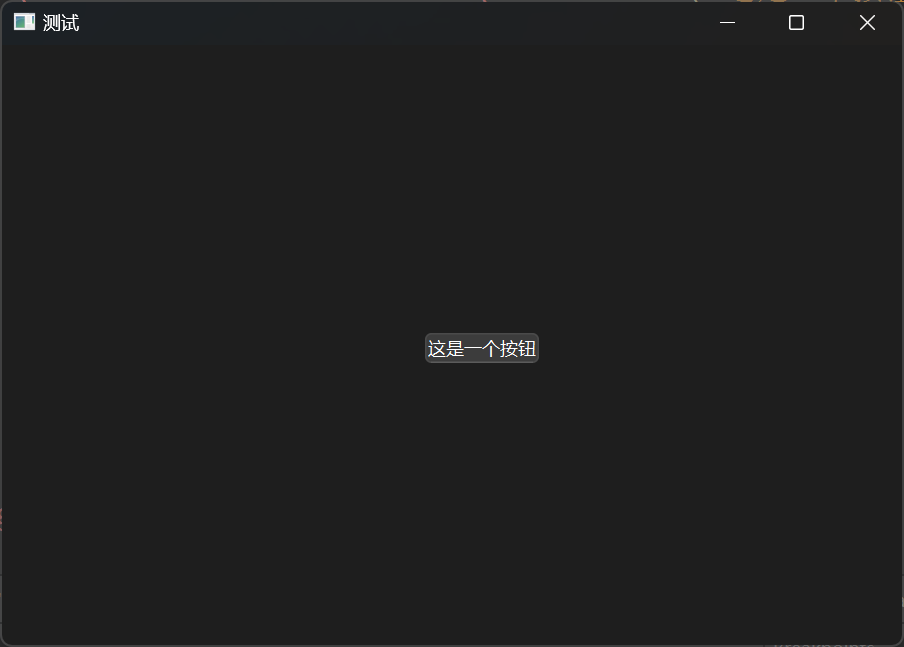
示例 所有代码如下所示:
1 2 3 4 5 6 7 8 9 10 11 12 13 14 15 16 17 18 19 20 #include "widget.h" #include <QPushButton> Widget::Widget (QWidget *parent) : QWidget (parent) { QPushButton * btn = new QPushButton ("这是一个按钮" ,this ); resize (600 , 400 ); btn->move (280 , 190 ); setWindowTitle ("测试" ); } Widget::~Widget () {}
结果展示:
对象树 对于普通的C++编程实例化,每次都需要手动回收创建在堆区的内存,但Qt不需要手动释放,这正是因为对象树的存在。
在Qt中创建对象的时候会提供一个Parent对象指针。QObject是以对象树的形式组织起来的,当创建一个 QObject对象时,会看到QObject的构造函数接收一个QObject指针作为参数,这个参数就是Parent,也就是父对象指针。
这相当于,在创建QObject对象时,可以提供一个其父对象,我们创建的这个QObject对象会自动添加到其父对象的children()列表。
当父对象析构的时候,这个列表中的所有对象也会被析构(注意,这里的父对象并不是继承意义上的父类)。
这种机制在GUI程序设计中相当有用。例如,一个按钮有一个QShortcut(快捷键)对象作为其子对象。当我们删除按钮的时候,这个快捷键理应被删除,因此这是合理的。
总的来说,当创建的对象在堆区的时候,如果指定的父亲是QObject派生下来的类或者QObject子类派生下来的类,可以不用管理内存释放的操作,对象会放到对象树中,这样一定程度上简化了内存回收机制。
Qt窗口坐标体系 坐标体系:以左上角为原点(0, 0),X向右增加,Y向下增加。
对于嵌套窗口,其坐标是相对于父窗口 来说的。
信号和槽 按钮信号 针对按钮的信号一共有四种:
信号
说明
clicked(bool checked = false)
点击
pressed()
按下
released()
释放
toggled(bool checked)
切换
点击按钮关闭窗口 实现点击按钮关闭窗口的功能主要有四个部分,首先需要有按钮,点击之后,窗口会执行关闭操作。
具体而言,整个流程是将信号的发送者,发送的具体信号,信号的接受者,信号的处理(槽)这四个部分进行connect连接。
信号与槽的优点是松散耦合,信号发送端和接受端是没有关联的,通过connect连接,将两端耦合在一起。
使用connect方法即可完成这一功能,一共需要传递四个参数。
参数1是信号的发送者,参数2是发送的信号(函数的地址),参数3是信号的接受者,参数4是处理的槽函数。
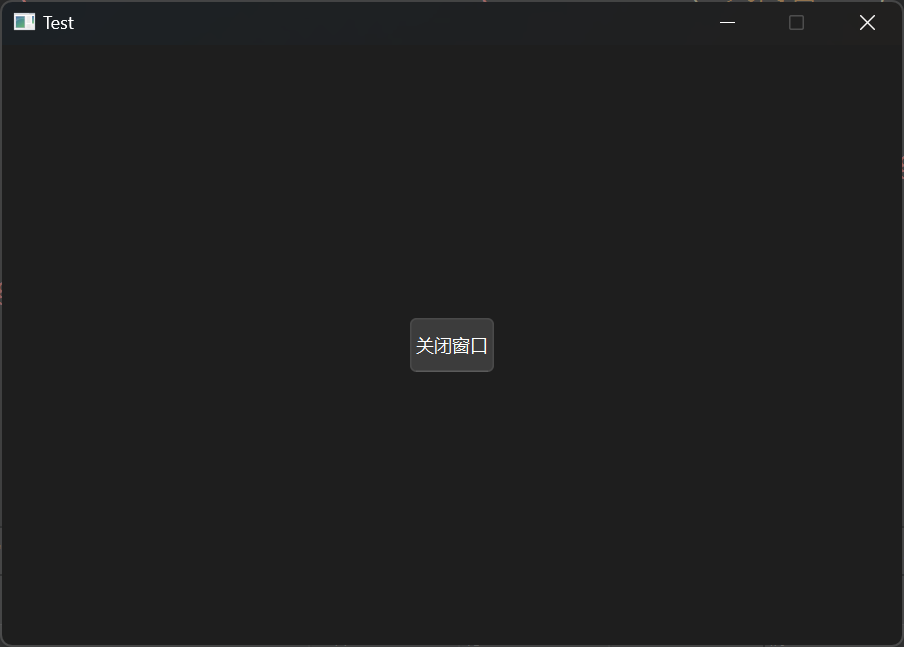
具体代码如下所示:
1 2 3 4 5 6 7 8 9 10 11 12 13 14 15 #include "widget.h" #include <QPushButton> Widget::Widget (QWidget *parent) : QWidget (parent) { QPushButton * btn = new QPushButton ("关闭窗口" , this ); setFixedSize (600 , 400 ); btn->resize (60 , 40 ); btn->move (270 ,180 ); connect (btn, &QPushButton::clicked, this , &Widget::close); } Widget::~Widget () {}
结果展示:
这样就实现了点击按钮关闭窗口的功能,只需要点击窗口中间的按钮,即可关闭。
自定义的信号和槽 对于创建的类,可以自定义信号和槽。
自定义的信号需要写在signals下,返回值必须是void。只需要声明,不需要实现,可以有参数,也可以发生重载。
自定义的槽在早期的版本中,必须要写在public slots下,高级版本可以写到public或者全局下。返回值是void,需要声明,也需要实现,可以有参数,也可以发生重载。
现在要实现这样的功能:下课的时候,老师说下课,然后学生离开教室。
为了完成这一需求,需要构造一个老师类和一个学生类。
老师类中,需要有sayClassIsOver这一信号,只声明不实现即可。
1 2 3 4 5 6 7 8 9 10 11 12 13 14 15 16 17 #ifndef TEACHER_H #define TEACHER_H #include <QObject> class Teacher : public QObject{ Q_OBJECT public : explicit Teacher (QObject *parent = nullptr ) signals: void sayClassIsOver () }; #endif
对应的cpp文件中不需要添加多余的东西。
1 2 3 4 5 6 #include "teacher.h" Teacher::Teacher (QObject *parent) : QObject{parent} {}
学生类需要构造对应的槽,在头文件中进行声明,源文件中进行编写。
1 2 3 4 5 6 7 8 9 10 11 12 13 14 15 16 17 18 #ifndef STUDENT_H #define STUDENT_H #include <QObject> class Student : public QObject{ Q_OBJECT public : explicit Student (QObject *parent = nullptr ) void Leave () signals: }; #endif
源文件中编写槽具体对应的功能。
1 2 3 4 5 6 7 8 9 10 11 12 13 #include "student.h" #include <QDebug> Student::Student (QObject *parent) : QObject{parent} {} void Student::Leave () qDebug () << "The students left the classroom." ; }
窗体代码中需要定义相应的成员,声明下课的函数。
1 2 3 4 5 6 7 8 9 10 11 12 13 14 15 16 17 18 19 20 21 22 23 24 25 26 27 28 29 30 31 #ifndef WIDGET_H #define WIDGET_H #include <QWidget> #include "teacher.h" #include "student.h" QT_BEGIN_NAMESPACE namespace Ui {class Widget ;} QT_END_NAMESPACE class Widget : public QWidget{ Q_OBJECT public : Widget (QWidget *parent = nullptr ); ~Widget (); private : Ui::Widget *ui; Teacher * teacher; Student * student; void classIsOver () }; #endif
源代码中进行对象实例化,使用emit关键字触发对应的信号。
1 2 3 4 5 6 7 8 9 10 11 12 13 14 15 16 17 18 19 20 21 22 23 24 25 26 27 28 29 30 31 32 33 34 35 36 #include "widget.h" #include "ui_widget.h" Widget::Widget (QWidget *parent) : QWidget (parent) , ui (new Ui::Widget) { ui->setupUi (this ); this ->teacher = new Teacher (); this ->student = new Student (); connect (this ->teacher, &Teacher::sayClassIsOver, this ->student, &Student::Leave); this ->classIsOver (); } void Widget::classIsOver () emit this ->teacher->sayClassIsOver (); } Widget::~Widget () { delete ui; }
结果展示:
1 The students left the classroom.
重载问题 上面讲到,自定义的信号和槽可以发生重载,这样连接的时候会产生问题,程序不知道该调用哪个函数。因此,如果要连接带参数的信号和槽,需要使用函数指针。
指针函数基本格式:
1 返回值类型(类名::* 函数指针名)(参数列表) = &类名::函数名
Teacher和Student需要分别定义重载的函数。
Teacher头文件:
1 2 3 4 5 6 7 8 9 10 11 12 13 14 15 16 17 18 19 #ifndef TEACHER_H #define TEACHER_H #include <QObject> class Teacher : public QObject{ Q_OBJECT public : explicit Teacher (QObject *parent = nullptr ) signals: void sayClassIsOver () void sayClassIsOver (QString subject) }; #endif
Teacher源文件:
1 2 3 4 5 6 #include "teacher.h" Teacher::Teacher (QObject *parent) : QObject{parent} {}
Student头文件:
1 2 3 4 5 6 7 8 9 10 11 12 13 14 15 16 17 18 19 20 #ifndef STUDENT_H #define STUDENT_H #include <QObject> class Student : public QObject{ Q_OBJECT public : explicit Student (QObject *parent = nullptr ) void Leave () void Leave (QString subject) signals: }; #endif
Student源文件:
1 2 3 4 5 6 7 8 9 10 11 12 13 14 15 16 17 18 #include "student.h" #include <QDebug> Student::Student (QObject *parent) : QObject{parent} {} void Student::Leave () qDebug () << "The students left the classroom." ; } void Student::Leave (QString subject) qDebug () << "The students left the " << subject << " classroom." ; }
窗口源文件:
1 2 3 4 5 6 7 8 9 10 11 12 13 14 15 16 17 18 19 20 21 22 23 24 25 26 27 28 29 30 31 32 33 34 35 36 37 38 #include "widget.h" #include "ui_widget.h" Widget::Widget (QWidget *parent) : QWidget (parent) , ui (new Ui::Widget) { ui->setupUi (this ); this ->teacher = new Teacher (); this ->student = new Student (); void (Teacher:: *teacherSignal)(QString) = &Teacher::sayClassIsOver; void (Student:: *studentSlot)(QString) = &Student::Leave; connect (this ->teacher, teacherSignal, this ->student, studentSlot); this ->classIsOver (); } void Widget::classIsOver () emit this ->teacher->sayClassIsOver ("English" ); } Widget::~Widget () { delete ui; }
结果展示:
1 The students left the "English" classroom.
可以发现,通过这种方式会额外输出一对引号。可以使用.toUtf8()转成QByteArray类型,在使用data()转成char *类型即可完成需求。
修改Student的源文件为:
1 2 3 4 5 6 7 8 9 10 11 12 13 14 15 16 17 18 #include "student.h" #include <QDebug> Student::Student (QObject *parent) : QObject{parent} {} void Student::Leave () qDebug () << "The students left the classroom." ; } void Student::Leave (QString subject) qDebug () << "The students left the" << subject.toUtf8 ().data () << "classroom." ; }
结果展示:
1 The students left the English classroom.
信号连接信号 信号不仅可以和槽进行连接,也可以直接与信号相连。
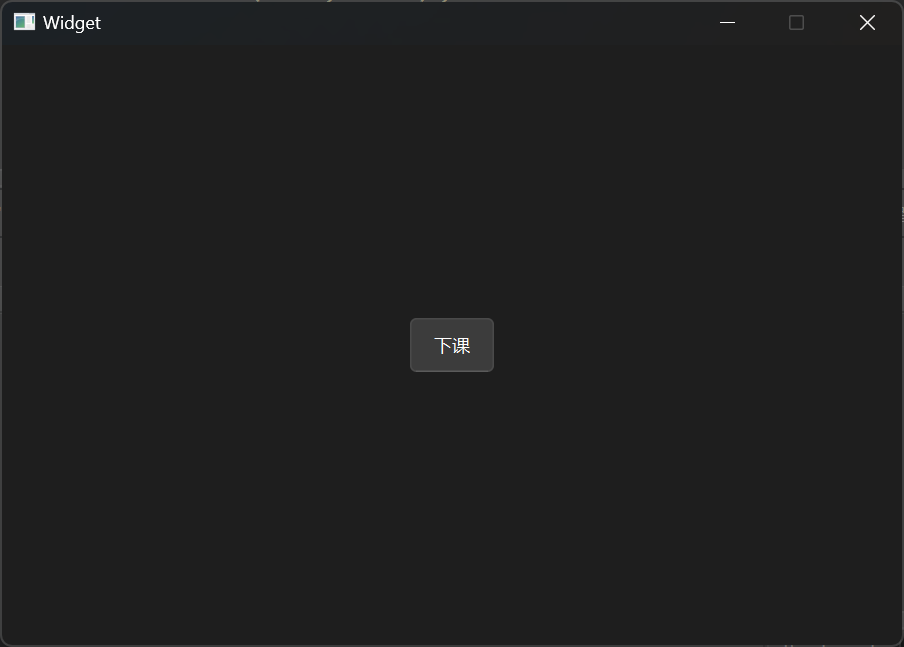
现在更改一下需求,设置一个下课按钮,每次点击都会输出一次学生离开教室。
1 2 3 4 5 6 7 8 9 10 11 12 13 14 15 16 17 18 19 20 21 22 23 24 25 26 27 28 29 30 31 32 33 34 35 36 37 38 39 40 41 42 43 44 #include "widget.h" #include "ui_widget.h" #include <QPushButton> Widget::Widget (QWidget *parent) : QWidget (parent) , ui (new Ui::Widget) { ui->setupUi (this ); this ->teacher = new Teacher (); this ->student = new Student (); connect (this ->teacher, &Teacher::sayClassIsOver, this ->student, &Student::Leave); QPushButton * btn = new QPushButton ("下课" ,this ); setFixedSize (600 , 400 ); btn->resize (60 , 40 ); btn->move (270 ,180 ); connect (btn, &QPushButton::clicked, this ->teacher, &Teacher::sayClassIsOver); } void Widget::classIsOver () emit this ->teacher->sayClassIsOver (); } Widget::~Widget () { delete ui; }
结果展示:
每一次点击下课按钮,都会输出学生离开教室的信息。
如果想要断开连接,可以使用disconnect,使用方法与connect相同。
1 disconnect (btn, &QPushButton::clicked, this ->teacher, &Teacher::sayClassIsOver);
拓展
信号是可以连接信号的。
一个信号可以连接多个槽函数。
多个信号,可以连接同一个槽函数。
信号和槽函数的参数,必须类型一一对应。
信号的参数个数,可以多于槽函数的参数个数。
Lambda表达式 C++11中的Lambda表达式用于定义并创建匿名的函数对象,以简化编程工作。
Lambda表达式的基本构成:
1 2 3 4 [capture](parameters)mutable ->return -type { statement }
[]表示一个Lambda的开始,这部分必须存在,不能省略 。函数对象参数是传递给编译器自动生成的函数对象类的构造函数的。函数对象参数只能使用那些到定义Lambda位置时Lambda所在作用范围内可见的局部变量(包括Lambda所在类的this)。函数对象参数有以下形式:
空。没有使用任何函数对象参数。
=。函数体内可以使用Lambda所在作用范围内所有可见的局部变量(包括Lambda所在类的this),并且是值传递方式 (相当于编译器自助为我们按值传递了所有局部变量)。&。函数体内可以使用Lambda所在作用范围内所有可见的局部变量(包括Lambda所在类的this),并且是引用传递方式 (相当于编译器自助为我们按引用传递了所有局部变量)。this。函数体内可以使用Lambda所在类中的成员变量。a。将a按值进行传递。按值进行传递时,函数体内不能修改传递进来的a的拷贝,因为默认情况下函数是const的。要求改传递进来的a的拷贝 ,可以添加mutable修饰符。&a。将a按引用进行传递。a,&b。将a按值进行传递,b按引用进行传递。=, &a, &b。除a和b按引用进行传递外,其他参数都按值进行传递。&, a, b。除a和b按值进行传递外,其它参数都按引用进行传递。
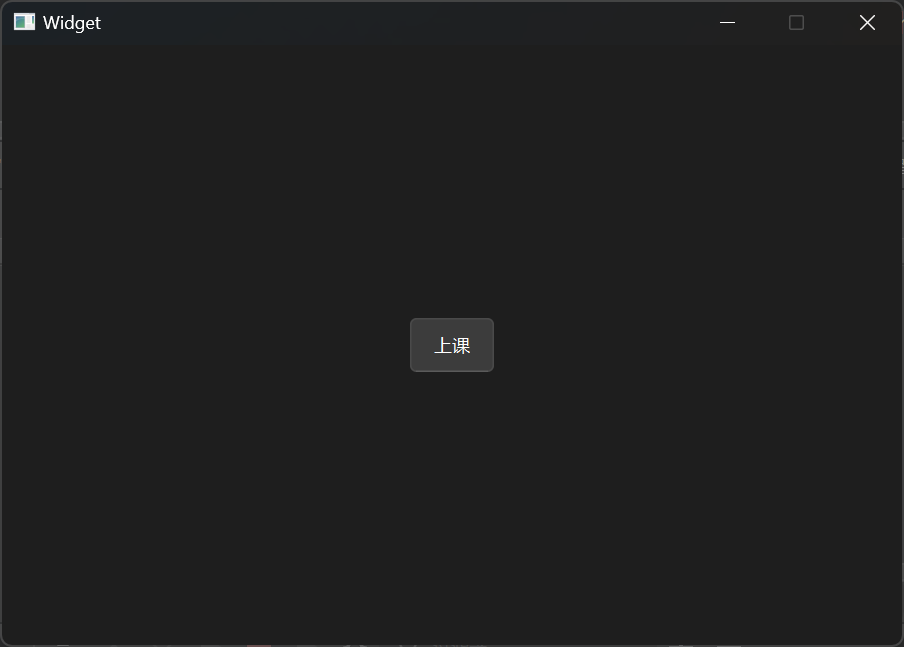
在点击按钮下课的例子中,可以尝试使用Lambda表达式将按钮上的文本信息改为“上课”。
1 2 3 4 5 6 7 8 9 10 11 12 13 14 15 16 17 18 19 20 21 22 23 24 25 26 27 28 29 30 31 32 33 34 35 36 37 38 39 40 41 42 43 44 45 46 47 48 49 #include "widget.h" #include "ui_widget.h" #include <QPushButton> Widget::Widget (QWidget *parent) : QWidget (parent) , ui (new Ui::Widget) { ui->setupUi (this ); this ->teacher = new Teacher (); this ->student = new Student (); connect (this ->teacher, &Teacher::sayClassIsOver, this ->student, &Student::Leave); QPushButton * btn = new QPushButton ("下课" ,this ); setFixedSize (600 , 400 ); btn->resize (60 , 40 ); btn->move (270 ,180 ); connect (btn, &QPushButton::clicked, this ->teacher, &Teacher::sayClassIsOver); [=]() { btn->setText ("上课" ); }(); } void Widget::classIsOver () emit this ->teacher->sayClassIsOver (); } Widget::~Widget () { delete ui; }
结果展示:
操作符重载函数参数,标识重载的()操作符的参数,没有参数时,这部分可以省略。参数可以通过按值和按引用两种方式进行传递。
可修改的标识符使用mutable声明,这部分可以省略。按值传递函数对象参数时,加上mutable修饰符后,可以修改按值传递进来的拷贝(注意是能修改拷贝,而不是值本身)。
例如现在声明一个变量,将其传递进Lambda表达式中,无法修改其值,但是加上mutable声明就可以进行修改了。
1 2 3 4 5 6 7 int m = 10 ; [m]() mutable { m += 10 ; qDebug () << m; }();
结果展示:
函数返回值,使用->标识函数返回值的类型,当返回值为void,或者函数体中只有一处return的地方(此时编译器可以自动推断出返回值类型)时,这部分可以省略。
1 2 3 4 5 int ret = []()->int { return 1000 ; }(); qDebug () << ret;
结果展示:
利用Lambda表达式可以在connect中充当槽函数的位置,简化代码。
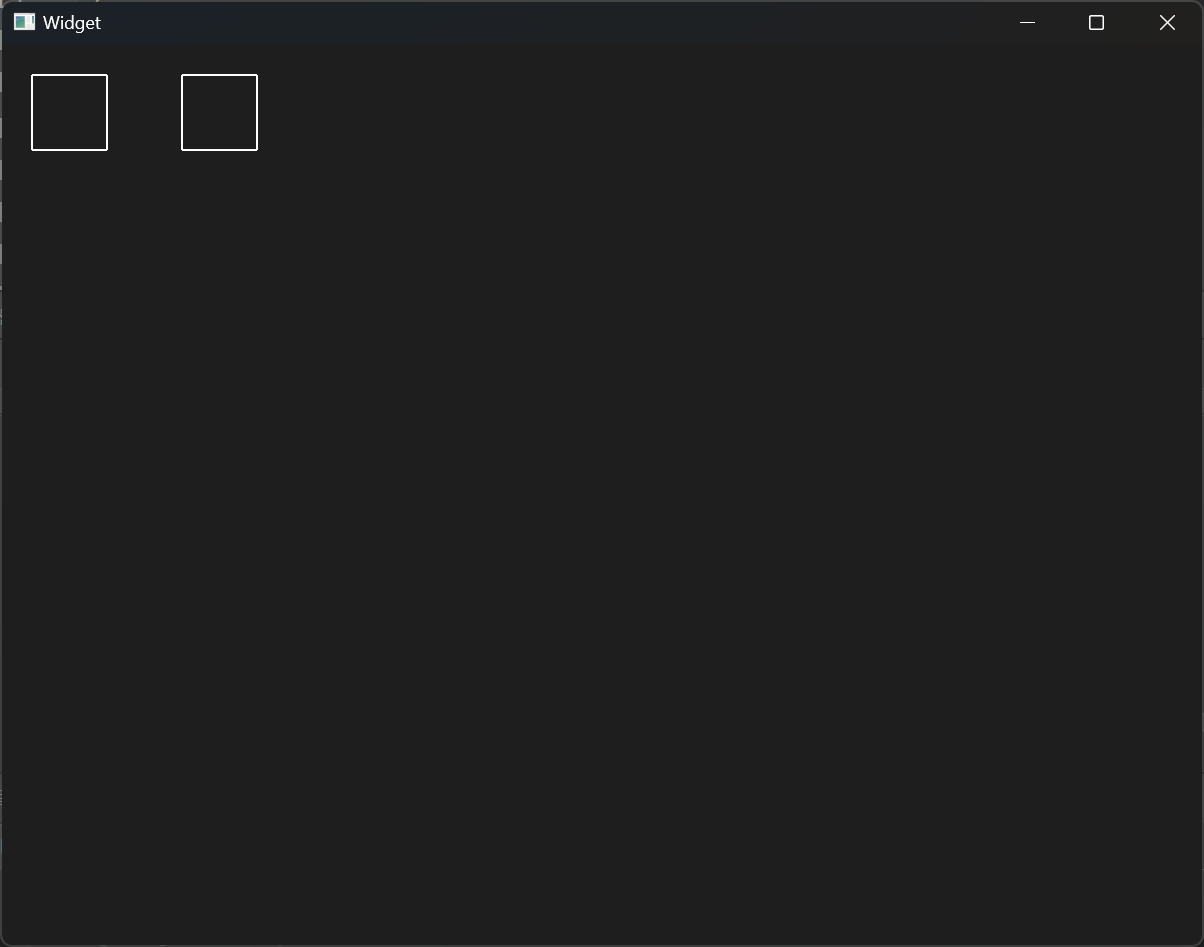
案例 制作一个窗口,里面包含一个按钮,初始显示为open。点击一次弹出一个新的窗口,且按钮变为close。点击close按钮会关闭弹出的窗口,且按钮变为open。
1 2 3 4 5 6 7 8 9 10 11 12 13 14 15 16 17 18 19 20 21 22 23 24 25 26 27 28 29 30 31 32 33 34 35 36 37 38 39 40 #include "widget.h" #include <QApplication> #include <QPushButton> int main (int argc, char *argv[]) QApplication a (argc, argv) ; Widget * w1 = new Widget; Widget * w2 = new Widget; QPushButton * btn = new QPushButton; btn->setCheckable (true ); w1->setFixedSize (600 , 400 ); w2->setFixedSize (200 , 200 ); btn->setParent (w1); btn->resize (60 , 40 ); btn->move (270 ,180 ); btn->setText ("open" ); QObject::connect (btn, &QPushButton::toggled, btn, [=](bool checked){ if (checked == false ) { btn->setText ("open" ); w2->close (); } else { w2->show (); btn->setText ("close" ); } }); w1->show (); return a.exec (); }
QMainWindow QMainWindow是一个为用户提供主窗口程序的类,包含一个菜单栏(menu bar)、多个工具栏(tool bars),多个锚接部件(dock widgets)、一个状态栏(status bar)及一个中心部件(central widget)。是许多应用程序的基础,如文本编辑器,图片编辑器等。
菜单栏 创建菜单栏 菜单栏所属的类是QMenuBar,创建菜单栏与创建按钮一致。需要注意的是,menuBar()是一个成员函数,因此不需要使用new。
1 QMenuBar * bar = menuBar ();
创建完成后,需要将菜单栏放入窗口中。
由于当前菜单为空,因此不会显示任何东西。如果想要构造菜单中的东西的话,需要引入QMenuBar头文件。
创建菜单 通过使用addMenu成员函数来创建菜单中的项目,这个函数有一个QMenu类型的指针返回值,需要用相应的指针变量接收,方便后续使用。
1 2 QMenu * fileMenu = bar->addMenu ("文件" ); QMenu * editMenu = bar->addMenu ("编辑" );
创建菜单项 调用相应指针中的addAcition成员函数,可以添加菜单项。
1 2 fileMenu->addAction ("新建" ); fileMenu->addAction ("打开" );
添加分隔符 我们平常使用的软件,菜单项之间一般会有一个分隔符,这个分隔符也是可以添加的。通过使用addSeparator成员函数,即可添加分隔符。
1 fileMenu->addSeparator ();
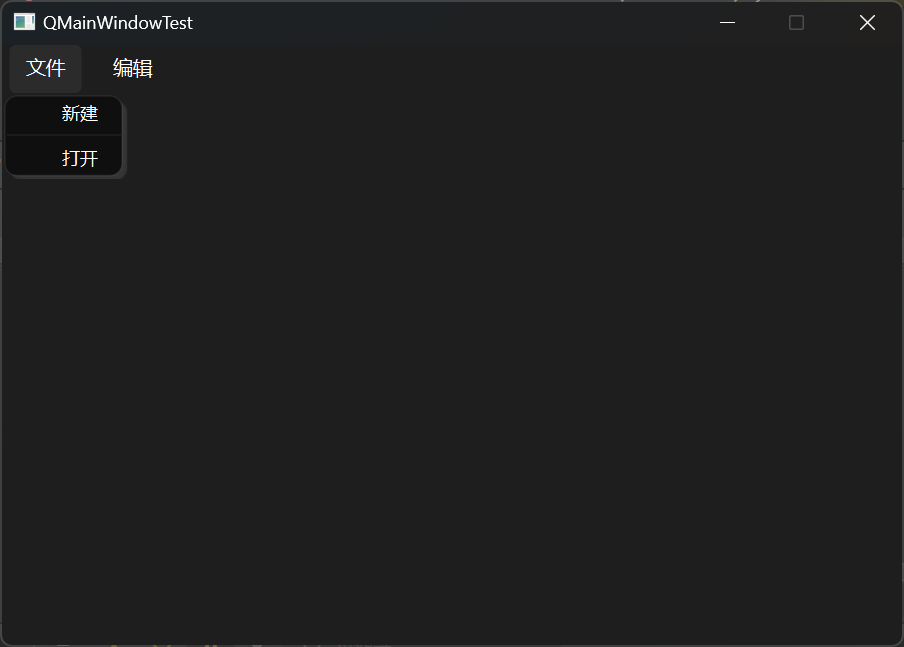
示例 完整代码:
1 2 3 4 5 6 7 8 9 10 11 12 13 14 15 16 17 18 19 20 21 22 23 24 25 26 #include "mainwindow.h" #include <QMenubar> MainWindow::MainWindow (QWidget *parent) : QMainWindow (parent) { setFixedSize (600 , 400 ); QMenuBar * bar = menuBar (); setMenuBar (bar); QMenu * fileMenu = bar->addMenu ("文件" ); QMenu * editMenu = bar->addMenu ("编辑" ); fileMenu->addAction ("新建" ); fileMenu->addSeparator (); fileMenu->addAction ("打开" ); } MainWindow::~MainWindow () {}
结果展示:
工具栏 创建工具栏 工具栏可以有多个,需要使用QToolBar头文件。
创建工具栏时只需要使用new实例化一个对象即可。
1 QToolBar * toolBar = new QToolBar (this );
创建出来的工具栏是独立出去的,需要使用addToolBar使其依附在窗口中。
默认位置 初始的工具栏默认位置在上方,如果想改变位置,可以使用相应的参数,例如想要让其初始位置在左边,可以写下面这段代码。
1 addToolBar (Qt::LeftToolBarArea, toolBar);
设置停靠权限 工具栏默认可以在任何位置停靠,可以通过枚举取或的方式来调整停靠权限。例如希望工具栏只能停留在左侧或右侧,则可以使用setAllowedAreas函数。
1 toolBar->setAllowedAreas (Qt::LeftToolBarArea | Qt::RightToolBarArea);
设置浮动 如果工具栏不进行停靠的话,可以浮动在任何地方。如果不想让他任意浮动的话,可以设置相应的参数。
1 toolBar->setFloatable (false );
设置移动 设置移动相当于一个总开关,如果置为false则不能进行移动。
1 toolBar->setMovable (false );
设置内容 与之前相类似,先创建相应的项目,然后添加到工具栏中。
1 2 3 4 5 QAction * welcomeAction = addAction ("欢迎" ); QAction * editAction = addAction ("编辑" ); toolBar->addAction (welcomeAction); toolBar->addAction (editAction);
设置分割线 工具栏中也可以使用addSeparator来设置分割线。
1 2 3 4 5 6 QAction * welcomeAction = addAction ("欢迎" ); QAction * editAction = addAction ("编辑" ); toolBar->addAction (welcomeAction); toolBar->addSeparator (); toolBar->addAction (editAction);
添加按钮 工具栏中也是可以添加按钮的,使用addWidget即可实现。
1 2 QPushButton * btn = new QPushButton ("Click Me!" , this ); toolBar->addWidget (btn);
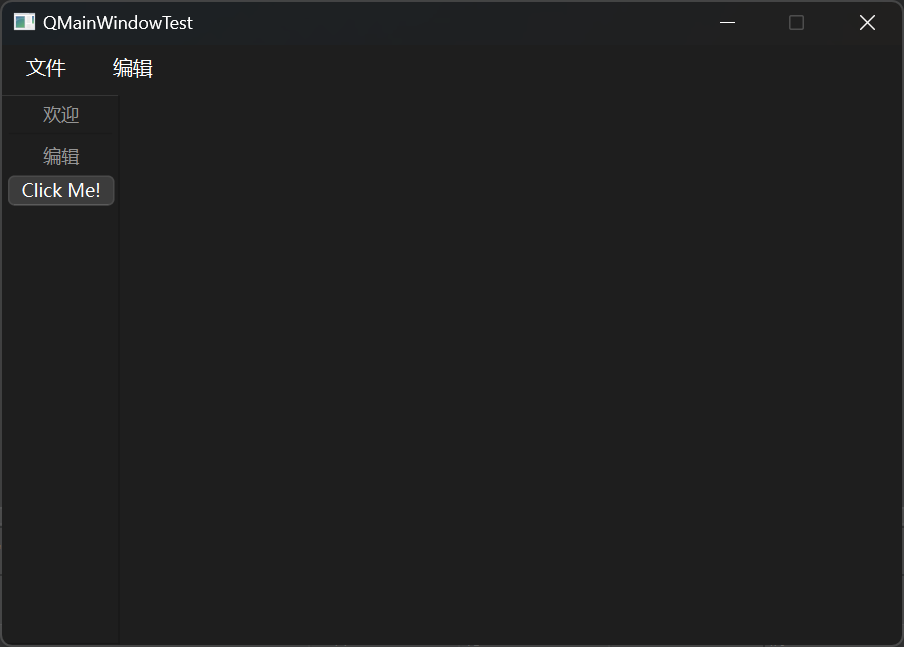
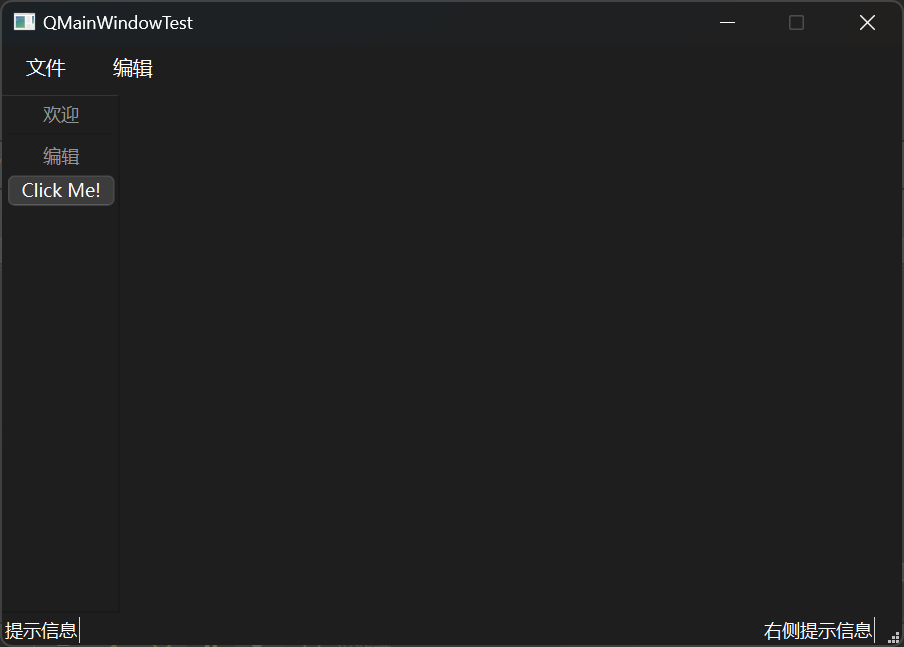
示例 完整代码:
1 2 3 4 5 6 7 8 9 10 11 12 13 14 15 16 17 18 19 20 21 22 23 24 25 26 27 28 29 30 31 32 33 34 35 36 37 38 39 40 41 42 43 44 45 46 47 48 49 50 51 52 53 #include "mainwindow.h" #include <QMenubar> #include <QToolBar> #include <QPushButton> MainWindow::MainWindow (QWidget *parent) : QMainWindow (parent) { setFixedSize (600 , 400 ); QMenuBar * bar = menuBar (); setMenuBar (bar); QMenu * fileMenu = bar->addMenu ("文件" ); QMenu * editMenu = bar->addMenu ("编辑" ); fileMenu->addAction ("新建" ); fileMenu->addSeparator (); fileMenu->addAction ("打开" ); QToolBar * toolBar = new QToolBar (this ); addToolBar (Qt::LeftToolBarArea, toolBar); toolBar->setAllowedAreas (Qt::LeftToolBarArea | Qt::RightToolBarArea); toolBar->setFloatable (false ); toolBar->setMovable (false ); QAction * welcomeAction = addAction ("欢迎" ); QAction * editAction = addAction ("编辑" ); toolBar->addAction (welcomeAction); toolBar->addSeparator (); toolBar->addAction (editAction); QPushButton * btn = new QPushButton ("Click Me!" , this ); toolBar->addWidget (btn); } MainWindow::~MainWindow () {}
结果展示:
状态栏 创建状态栏 状态栏最多只有一个,需要使用头文件QStatusBar。和菜单栏一样,创建时使用的都是成员函数,使用对应类型的指针即可。
1 QStatusBar * stBar = statusBar ();
创建后,同样需要将其放入窗口中。
放置标签控件 标签控件使用的头文件是QLabel,和按钮一样,需要实例化来创建,调用addWidget来添加到状态栏中。
1 2 QLabel * label = new QLabel ("提示信息" , this ); stBar->addWidget (label);
设置标签位置 使用上述方法设置的标签默认位置在左侧,如果想要设置在右侧可以使用addPermanentWidget方法。
1 2 QLabel * label_ = new QLabel ("右侧提示信息" , this ); stBar->addPermanentWidget (label_);
示例 完整代码:
1 2 3 4 5 6 7 8 9 10 11 12 13 14 15 16 17 18 19 20 21 22 23 24 25 26 27 28 29 30 31 32 33 34 35 36 37 38 39 40 41 42 43 44 45 46 47 48 49 50 51 52 53 54 55 56 57 58 59 60 61 62 63 64 65 66 67 68 #include "mainwindow.h" #include <QMenubar> #include <QToolBar> #include <QStatusBar> #include <QPushButton> #include <QLabel> MainWindow::MainWindow (QWidget *parent) : QMainWindow (parent) { setFixedSize (600 , 400 ); QMenuBar * bar = menuBar (); setMenuBar (bar); QMenu * fileMenu = bar->addMenu ("文件" ); QMenu * editMenu = bar->addMenu ("编辑" ); fileMenu->addAction ("新建" ); fileMenu->addSeparator (); fileMenu->addAction ("打开" ); QToolBar * toolBar = new QToolBar (this ); addToolBar (Qt::LeftToolBarArea, toolBar); toolBar->setAllowedAreas (Qt::LeftToolBarArea | Qt::RightToolBarArea); toolBar->setFloatable (false ); toolBar->setMovable (false ); QAction * welcomeAction = addAction ("欢迎" ); QAction * editAction = addAction ("编辑" ); toolBar->addAction (welcomeAction); toolBar->addSeparator (); toolBar->addAction (editAction); QPushButton * btn = new QPushButton ("Click Me!" , this ); toolBar->addWidget (btn); QStatusBar * stBar = statusBar (); setStatusBar (stBar); QLabel * label = new QLabel ("提示信息" , this ); stBar->addWidget (label); QLabel * label_ = new QLabel ("右侧提示信息" , this ); stBar->addPermanentWidget (label_); } MainWindow::~MainWindow () {}
结果展示:
铆接部件 创建铆接部件 铆接部件是浮动的窗口,可以有多个,需要使用头文件QDockWidget。由于有多个,因此可以使用实例化的方式来创建,初始可以设置铆接部件的名称和Parent。
添加到窗口中需要使用addDockWidget函数,其中有两个参数,第一个是铆接部件的位置信息,第二个是铆接部件对象。
1 2 QDockWidget * dockWidget = new QDockWidget ("浮动" , this ); addDockWidget (Qt::BottomDockWidgetArea, dockWidget);
设置停靠权限 铆接部件可以在上下左右四个位置进行停靠,可以通过设置来改变其权限,例如如果只想使其实现上下停靠,可以使用如下代码。
示例 完整代码:
1 2 3 4 5 6 7 8 9 10 11 12 13 14 15 16 17 18 19 20 21 22 23 24 25 26 27 28 29 30 31 32 33 34 35 36 37 38 39 40 41 42 43 44 45 46 47 48 49 50 51 52 53 54 55 56 57 58 59 60 61 62 63 64 65 66 67 68 69 70 71 72 73 74 75 76 #include "mainwindow.h" #include <QMenubar> #include <QToolBar> #include <QStatusBar> #include <QDockWidget> #include <QPushButton> #include <QLabel> MainWindow::MainWindow (QWidget *parent) : QMainWindow (parent) { setFixedSize (600 , 400 ); QMenuBar * bar = menuBar (); setMenuBar (bar); QMenu * fileMenu = bar->addMenu ("文件" ); QMenu * editMenu = bar->addMenu ("编辑" ); fileMenu->addAction ("新建" ); fileMenu->addSeparator (); fileMenu->addAction ("打开" ); QToolBar * toolBar = new QToolBar (this ); addToolBar (Qt::LeftToolBarArea, toolBar); toolBar->setAllowedAreas (Qt::LeftToolBarArea | Qt::RightToolBarArea); toolBar->setFloatable (false ); toolBar->setMovable (false ); QAction * welcomeAction = addAction ("欢迎" ); QAction * editAction = addAction ("编辑" ); toolBar->addAction (welcomeAction); toolBar->addSeparator (); toolBar->addAction (editAction); QPushButton * btn = new QPushButton ("Click Me!" , this ); toolBar->addWidget (btn); QStatusBar * stBar = statusBar (); setStatusBar (stBar); QLabel * label = new QLabel ("提示信息" , this ); stBar->addWidget (label); QLabel * label_ = new QLabel ("右侧提示信息" , this ); stBar->addPermanentWidget (label_); QDockWidget * dockWidget = new QDockWidget ("浮动" , this ); addDockWidget (Qt::BottomDockWidgetArea, dockWidget); dockWidget->setAllowedAreas (Qt::TopDockWidgetArea | Qt::BottomDockWidgetArea); } MainWindow::~MainWindow () {}
结果展示:
核心部件 核心部件可以理解为工作区,例如想要设置一个记事本,可以引入QTextEdit头文件。核心部件只能有一个,需要使用setCentralWidget方法来设置。
1 2 QTextEdit * edit = new QTextEdit (this ); setCentralWidget (edit);
示例 完整代码:
1 2 3 4 5 6 7 8 9 10 11 12 13 14 15 16 17 18 19 20 21 22 23 24 25 26 27 28 29 30 31 32 33 34 35 36 37 38 39 40 41 42 43 44 45 46 47 48 49 50 51 52 53 54 55 56 57 58 59 60 61 62 63 64 65 66 67 68 69 70 71 72 73 74 75 76 77 78 79 80 81 82 #include "mainwindow.h" #include <QMenubar> #include <QToolBar> #include <QStatusBar> #include <QDockWidget> #include <QPushButton> #include <QLabel> #include <QTextEdit> MainWindow::MainWindow (QWidget *parent) : QMainWindow (parent) { setFixedSize (600 , 400 ); QMenuBar * bar = menuBar (); setMenuBar (bar); QMenu * fileMenu = bar->addMenu ("文件" ); QMenu * editMenu = bar->addMenu ("编辑" ); fileMenu->addAction ("新建" ); fileMenu->addSeparator (); fileMenu->addAction ("打开" ); QToolBar * toolBar = new QToolBar (this ); addToolBar (Qt::LeftToolBarArea, toolBar); toolBar->setAllowedAreas (Qt::LeftToolBarArea | Qt::RightToolBarArea); toolBar->setFloatable (false ); toolBar->setMovable (false ); QAction * welcomeAction = addAction ("欢迎" ); QAction * editAction = addAction ("编辑" ); toolBar->addAction (welcomeAction); toolBar->addSeparator (); toolBar->addAction (editAction); QPushButton * btn = new QPushButton ("Click Me!" , this ); toolBar->addWidget (btn); QStatusBar * stBar = statusBar (); setStatusBar (stBar); QLabel * label = new QLabel ("提示信息" , this ); stBar->addWidget (label); QLabel * label_ = new QLabel ("右侧提示信息" , this ); stBar->addPermanentWidget (label_); QDockWidget * dockWidget = new QDockWidget ("浮动" , this ); addDockWidget (Qt::BottomDockWidgetArea, dockWidget); dockWidget->setAllowedAreas (Qt::TopDockWidgetArea | Qt::BottomDockWidgetArea); QTextEdit * edit = new QTextEdit (this ); setCentralWidget (edit); } MainWindow::~MainWindow () {}
结果展示:
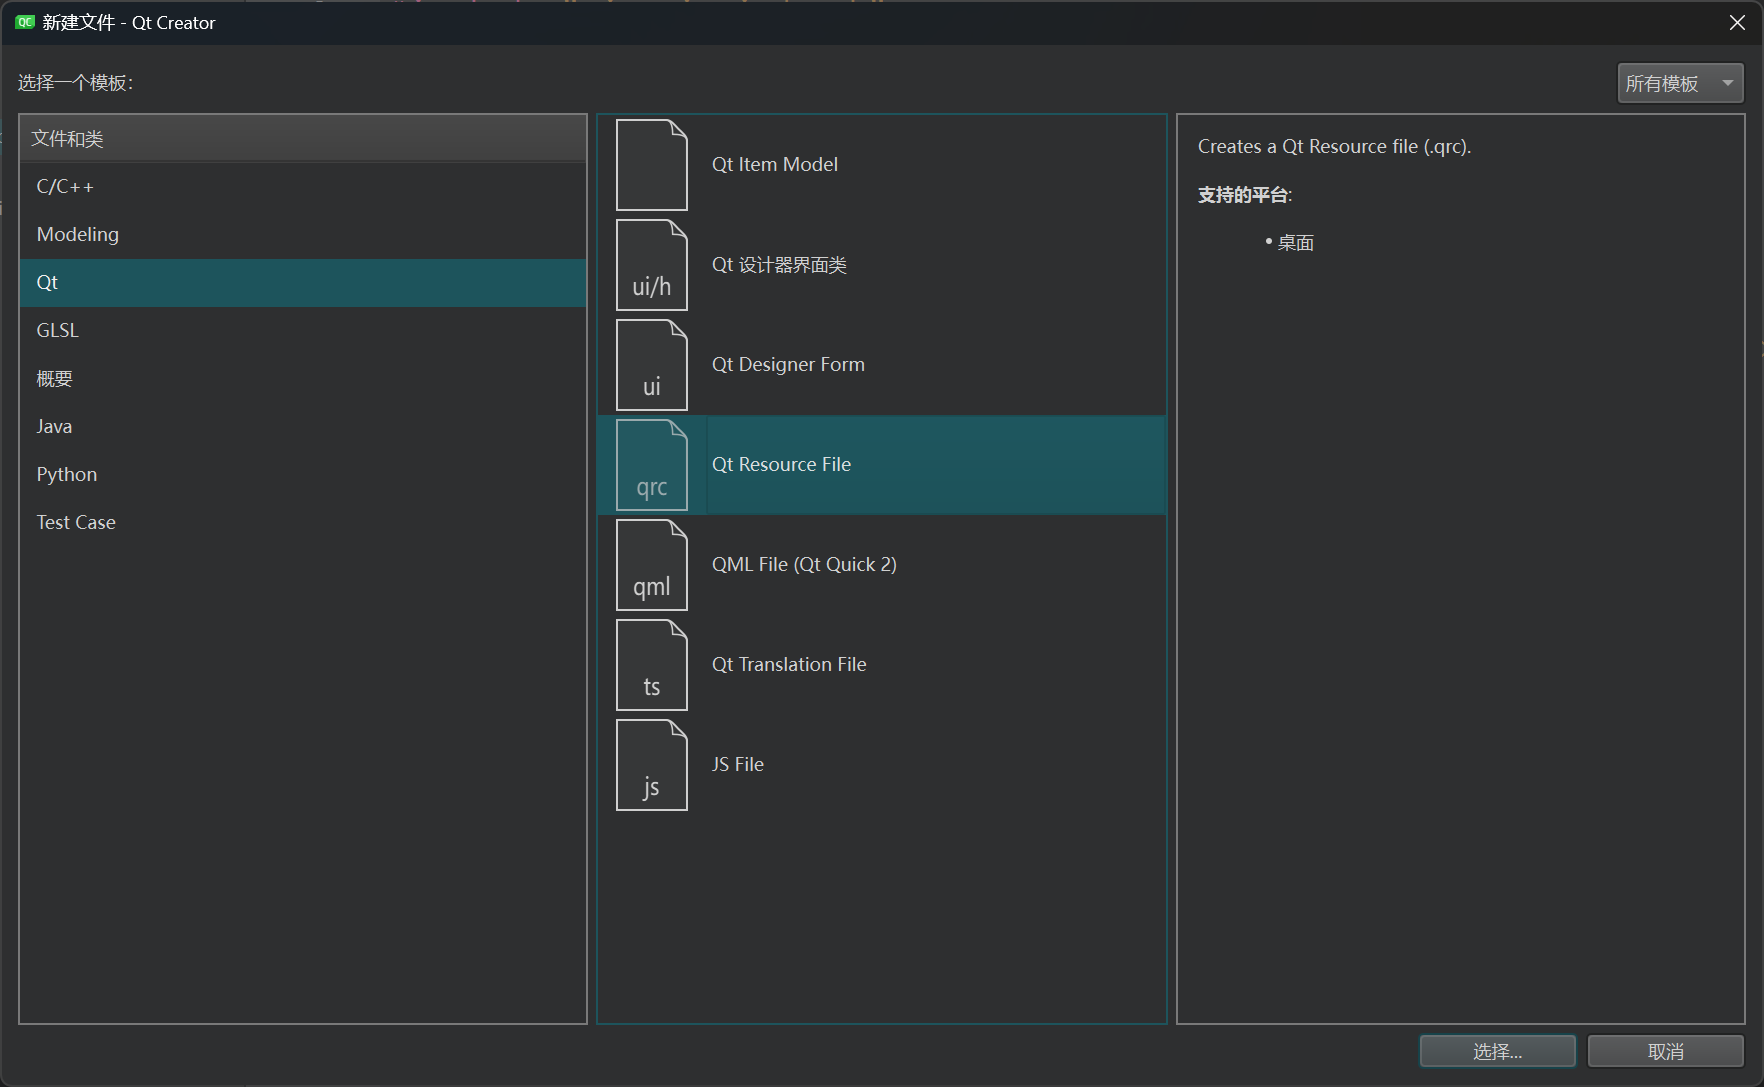
资源文件 资源文件指的是图片、视频这类文件,需要先把要添加的资源文件复制到项目文件夹中,右键项目选择添加新文件。
在文件和类下的Qt中找到Qt Resource File,选择后对资源文件起一个名称,下一步即可。
首先需要添加一个前缀,用于区分不同类别的资源,如果不想进行区分,写一个/即可。
创建完前缀后,可以点击添加文件将文件导入进来,编译后即可显示。
使用添加Qt资源的基本格式如下所示:
例如想要对ui下的一个对象添加图标,可以使用下面这段代码:
1 ui->actionNew->setIcon (QIcon (":/favicon" ));
可以看到图标均可正常显示。
对话框 对话框分为两种,分别是模态对话框和非模态对话框。模态对话框不可以对其他窗口进行操作,非模态对话框可以对其他窗口操作。
现在想要实现一个功能:点击新建按钮,弹出一个对话框。
为了实现这一功能,需要先引入对话框的头文件。
接着需要使用槽函数,来建立对应的关系,对于QAction类型的对象而言,点击对应的信号是triggered。
模态对话框创建 先建立一个模态对话框,由于不可以对其他窗口进行操作,因此需要对原有的进程进行阻塞。如果不对弹出的对话框进行任何操作的话,会产生对话框太小的警告,因此可以先提前设置一下对话框的大小。
1 2 3 4 5 6 7 8 9 10 11 12 13 14 15 16 17 18 19 20 21 22 23 24 25 26 27 28 #include "mainwindow.h" #include "ui_mainwindow.h" #include <QDialog> MainWindow::MainWindow (QWidget *parent) : QMainWindow (parent) , ui (new Ui::MainWindow) { ui->setupUi (this ); connect (ui->actionNew, &QAction::triggered, [=](){ QDialog dlg (this ); dlg.resize (200 , 100 ); dlg.exec (); }); } MainWindow::~MainWindow () { delete ui; }
结果展示:
非模态对话框创建 非模态对话框需要将对话框开辟在堆区,因为它不需要进行阻塞,如果不开辟在堆区的话,会在执行完这个函数后直接消失掉。
同时,为了能够在有对话框的时候进行操作,需要使用show方法进行显示。
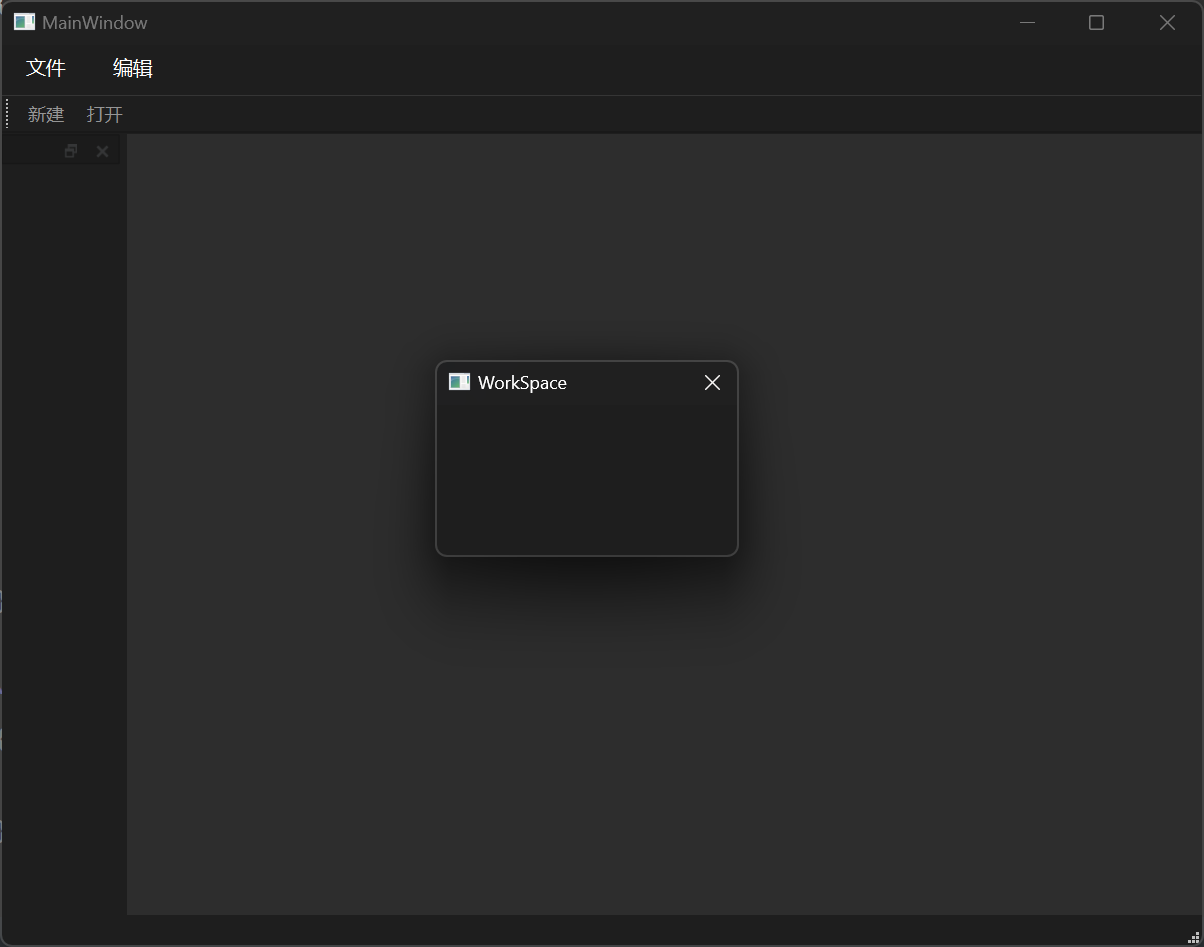
1 2 3 4 5 6 7 8 9 10 11 12 13 14 15 16 17 18 19 20 21 22 23 24 25 26 27 28 #include "mainwindow.h" #include "ui_mainwindow.h" #include <QDialog> MainWindow::MainWindow (QWidget *parent) : QMainWindow (parent) , ui (new Ui::MainWindow) { ui->setupUi (this ); connect (ui->actionNew, &QAction::triggered, [=](){ QDialog * dlg = new QDialog (this ); dlg->resize (200 , 100 ); dlg->show (); }); } MainWindow::~MainWindow () { delete ui; }
结果展示:
上述代码有一个问题,创建了一个对话框在堆区,而它是挂在this上的,这就导致只有整个程序关闭才会释放掉这部分内存。为了解决这一问题,可以调用setAttribute中的Qt::WA_DeleteOnClose属性,这是55号属性,可以保证在关闭子窗口时主动释放掉它。
1 2 3 4 5 6 7 8 9 10 11 12 13 14 15 16 17 18 19 20 21 22 23 24 25 26 27 28 29 30 #include "mainwindow.h" #include "ui_mainwindow.h" #include <QDialog> MainWindow::MainWindow (QWidget *parent) : QMainWindow (parent) , ui (new Ui::MainWindow) { ui->setupUi (this ); connect (ui->actionNew, &QAction::triggered, [=](){ QDialog * dlg = new QDialog (this ); dlg->resize (200 , 100 ); dlg->show (); dlg->setAttribute (Qt::WA_DeleteOnClose); }); } MainWindow::~MainWindow () { delete ui; }
消息对话框 消息对话框是一种模态对话框,用于显示信息、询问问题等。
使用消息对话框需要先调用其头文件。
错误对话框 消息对话框中几种基础对话框都是静态的,因此可以创建对象调用,也可以直接在类上调用。
错误对话框用于提示一些错误信息。
1 QMessageBox::critical (this , "critical" , "错误" );
第一个参数指定了父亲,第二个参数是对话框的标题,第三个参数是显示的信息。
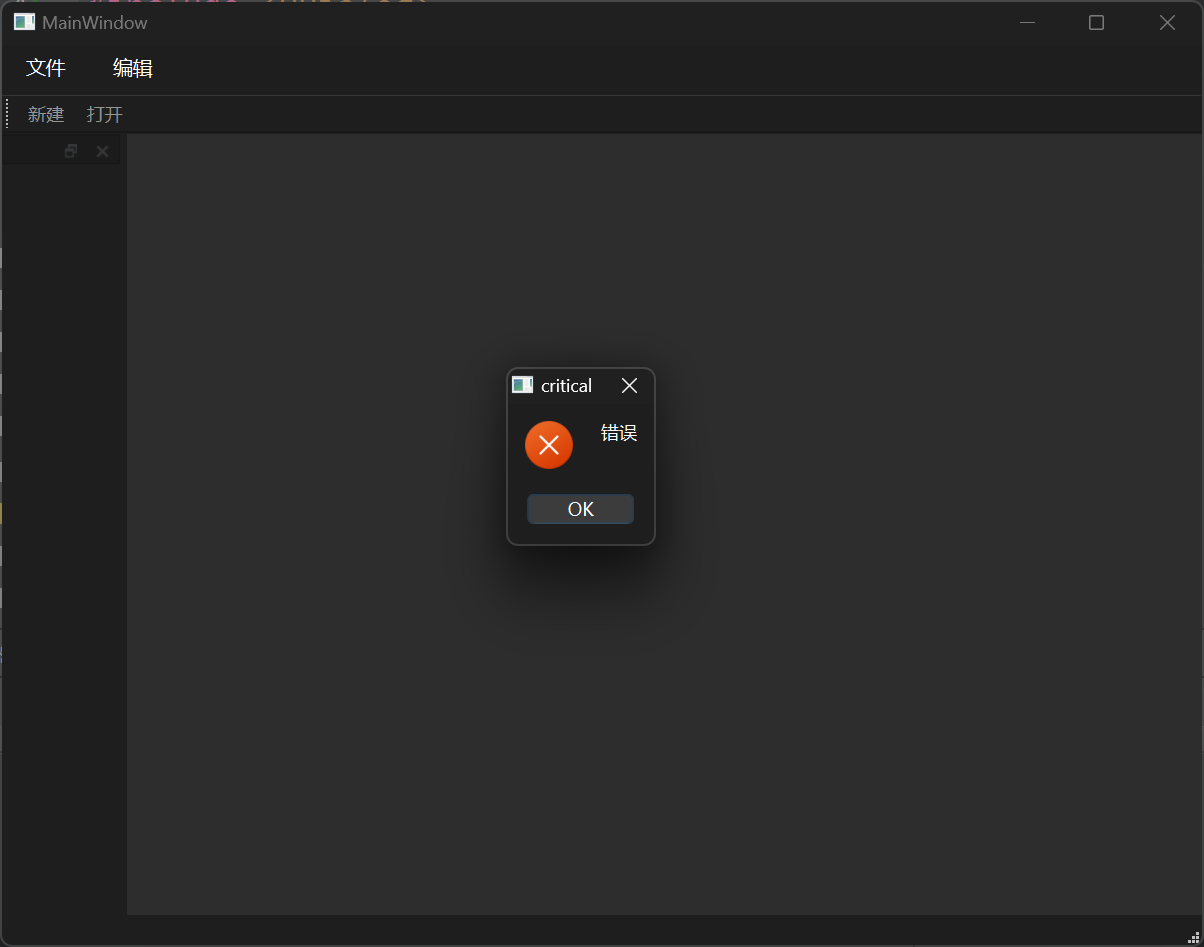
1 2 3 4 5 6 7 8 9 10 11 12 13 14 15 16 17 18 19 20 21 22 #include "mainwindow.h" #include "ui_mainwindow.h" #include <QDialog> #include <QMessageBox> MainWindow::MainWindow (QWidget *parent) : QMainWindow (parent) , ui (new Ui::MainWindow) { ui->setupUi (this ); connect (ui->actionNew, &QAction::triggered, [=](){ QMessageBox::critical (this , "critical" , "错误" ); }); } MainWindow::~MainWindow () { delete ui; }
结果展示:
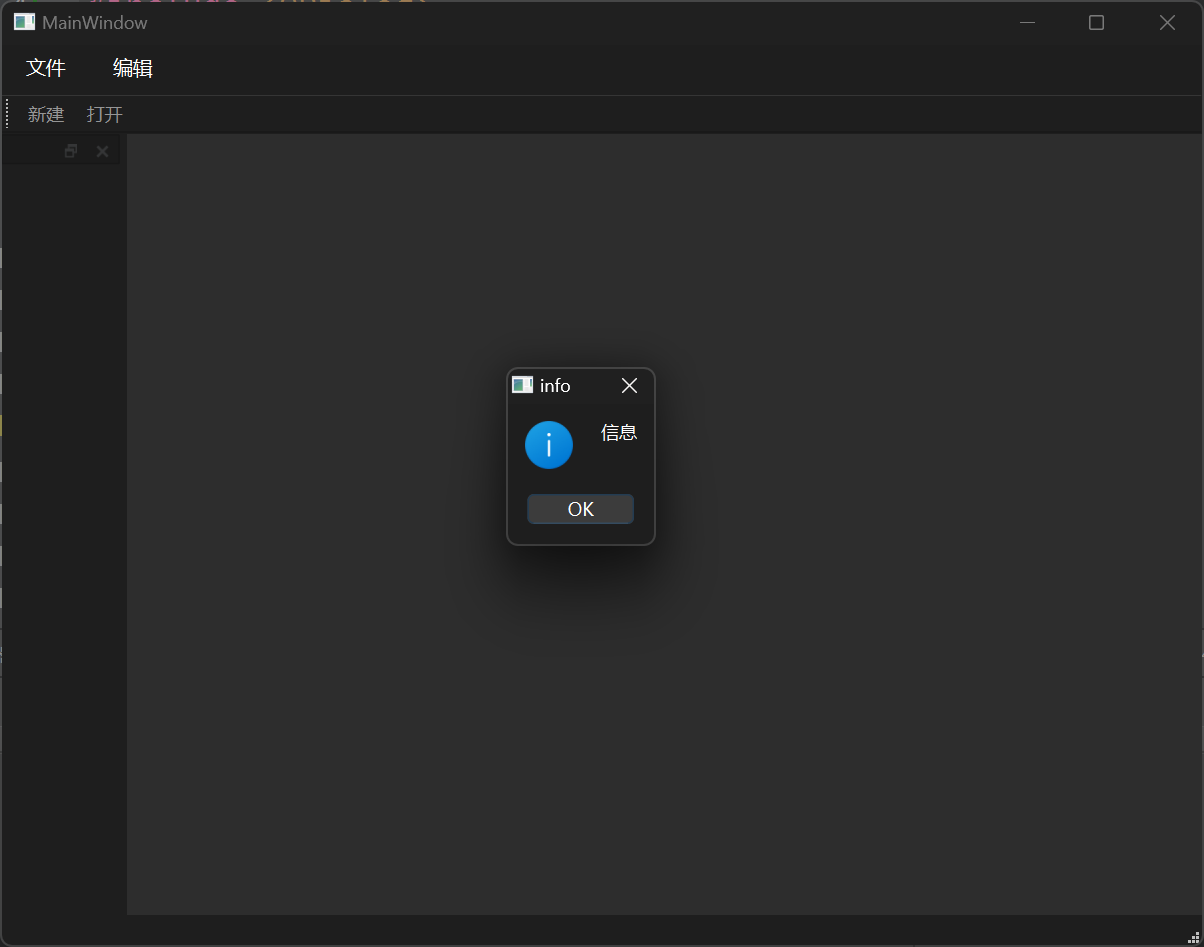
信息对话框 信息对话框用于提示一些重要信息。
1 QMessageBox::information (this , "info" , "信息" );
第一个参数指定了父亲,第二个参数是对话框的标题,第三个参数是显示的信息。
1 2 3 4 5 6 7 8 9 10 11 12 13 14 15 16 17 18 19 20 21 22 #include "mainwindow.h" #include "ui_mainwindow.h" #include <QDialog> #include <QMessageBox> MainWindow::MainWindow (QWidget *parent) : QMainWindow (parent) , ui (new Ui::MainWindow) { ui->setupUi (this ); connect (ui->actionNew, &QAction::triggered, [=](){ QMessageBox::information (this , "info" , "信息" ); }); } MainWindow::~MainWindow () { delete ui; }
结果展示:
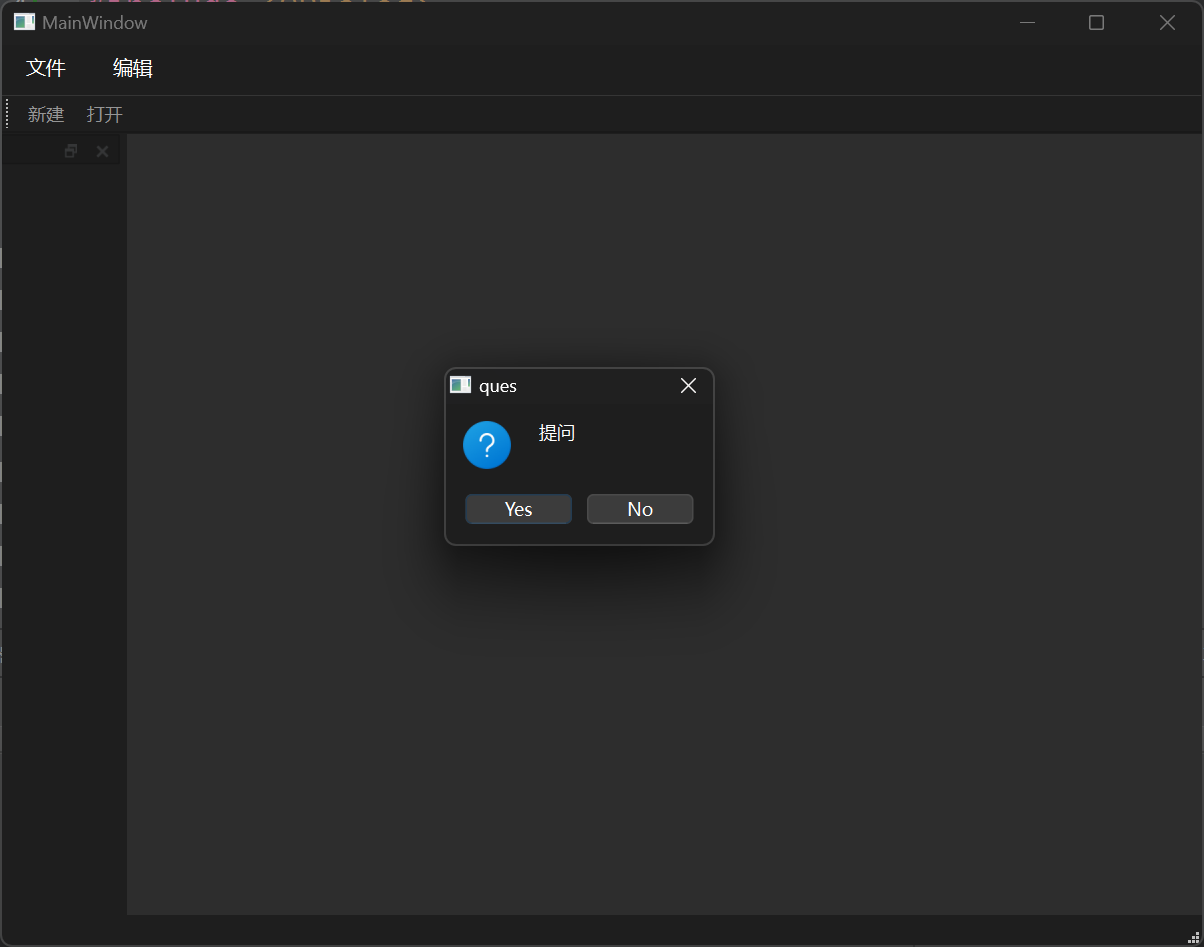
提问对话框 提问对话框用于让用户选择。
1 QMessageBox::question (this , "ques" , "提问" );
第一个参数指定了父亲,第二个参数是对话框的标题,第三个参数是显示的信息。
1 2 3 4 5 6 7 8 9 10 11 12 13 14 15 16 17 18 19 20 21 22 #include "mainwindow.h" #include "ui_mainwindow.h" #include <QDialog> #include <QMessageBox> MainWindow::MainWindow (QWidget *parent) : QMainWindow (parent) , ui (new Ui::MainWindow) { ui->setupUi (this ); connect (ui->actionNew, &QAction::triggered, [=](){ QMessageBox::question (this , "ques" , "提问" ); }); } MainWindow::~MainWindow () { delete ui; }
结果展示:
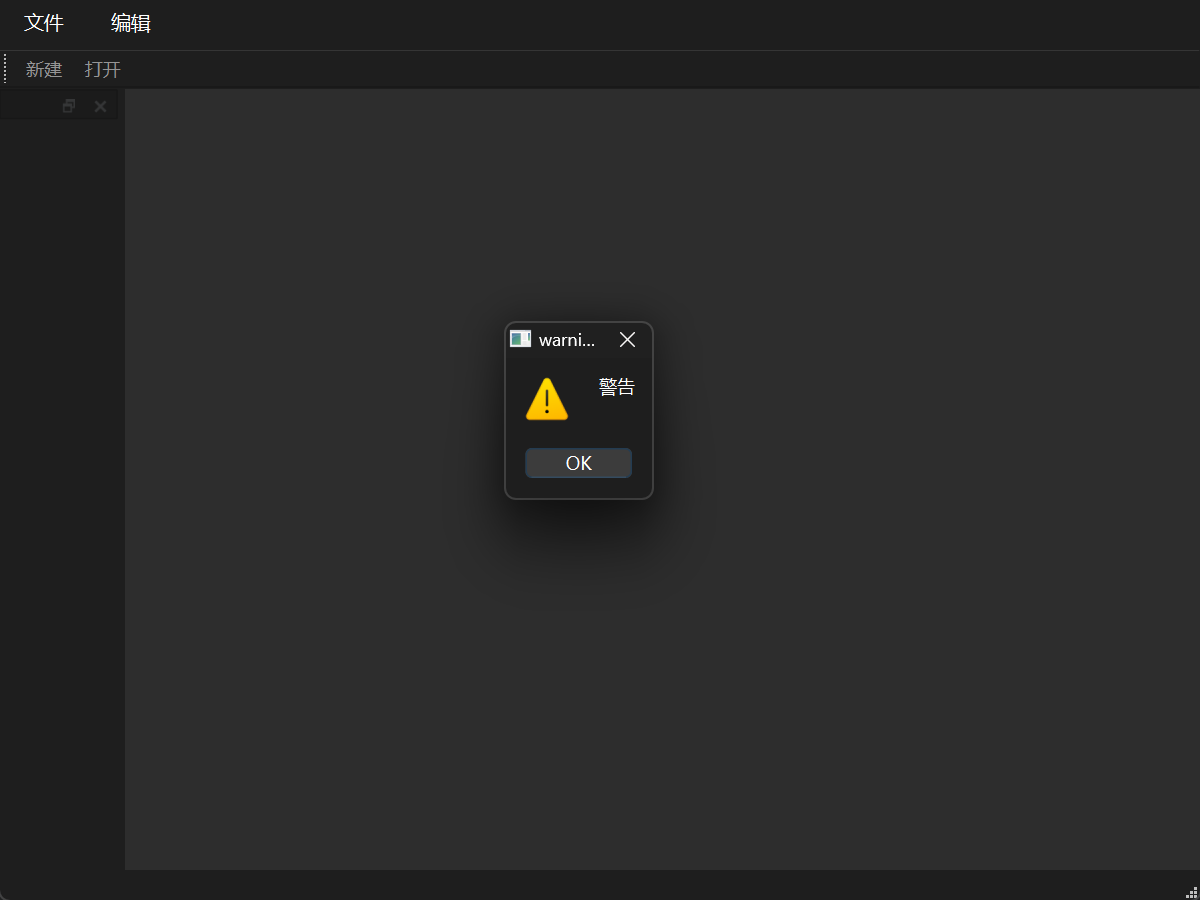
警告对话框 警告对话框用于让警告一些信息。
1 QMessageBox::warning (this , "warning" , "警告" );
第一个参数指定了父亲,第二个参数是对话框的标题,第三个参数是显示的信息。
1 2 3 4 5 6 7 8 9 10 11 12 13 14 15 16 17 18 19 20 21 22 #include "mainwindow.h" #include "ui_mainwindow.h" #include <QDialog> #include <QMessageBox> MainWindow::MainWindow (QWidget *parent) : QMainWindow (parent) , ui (new Ui::MainWindow) { ui->setupUi (this ); connect (ui->actionNew, &QAction::triggered, [=](){ QMessageBox::warning (this , "warning" , "警告" ); }); } MainWindow::~MainWindow () { delete ui; }
结果展示:
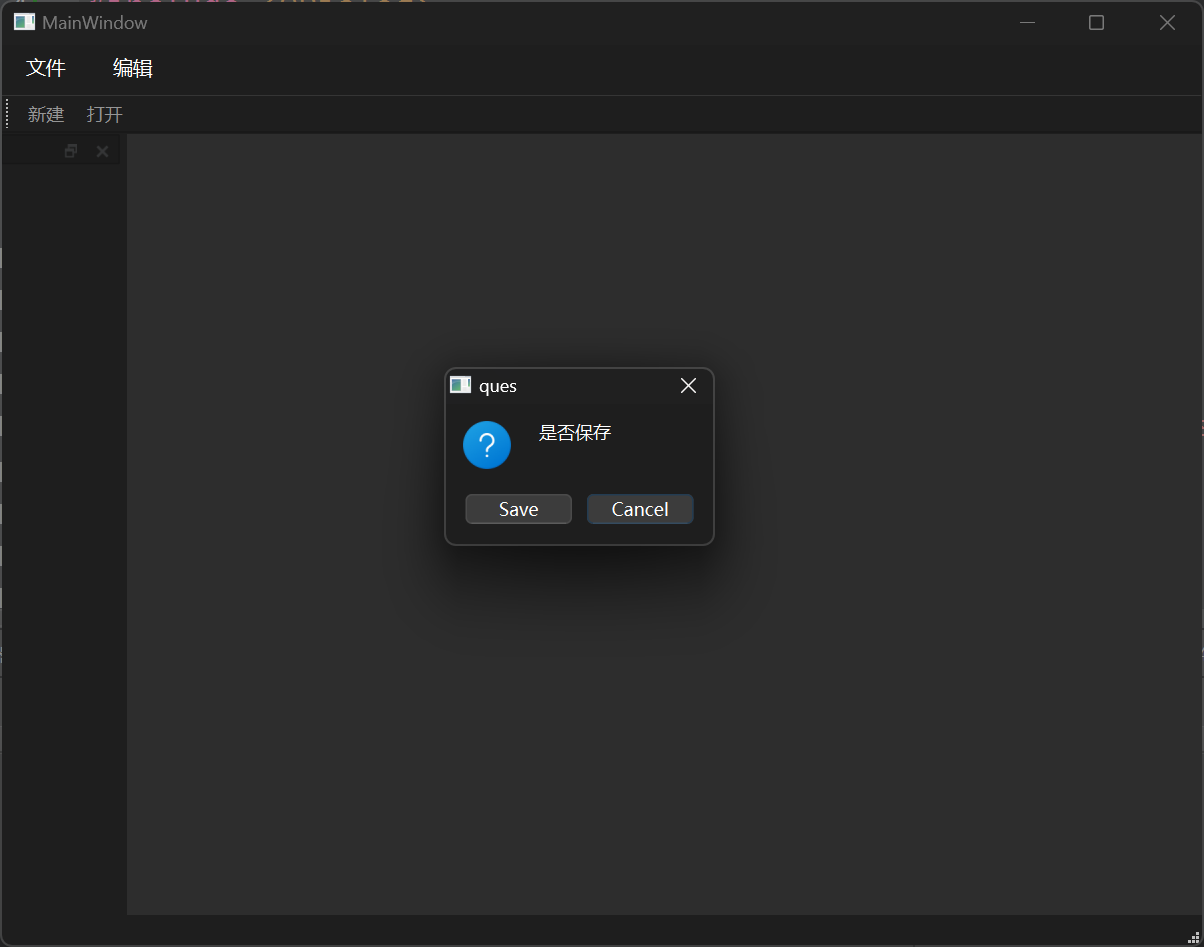
对话框参数 消息对话框一共有五个参数。参数1是父亲,参数2是标题,参数3是提示内容,参数4是关联按键类型,参数5是默认关联回车的按键。
例如,制作一个提问提示窗口,询问用户是否保存,默认关联取消。
1 QMessageBox::question (this , "ques" , "是否保存" , QMessageBox::Save | QMessageBox::Cancel, QMessageBox::Cancel);
完整代码:
1 2 3 4 5 6 7 8 9 10 11 12 13 14 15 16 17 18 19 20 21 22 #include "mainwindow.h" #include "ui_mainwindow.h" #include <QDialog> #include <QMessageBox> MainWindow::MainWindow (QWidget *parent) : QMainWindow (parent) , ui (new Ui::MainWindow) { ui->setupUi (this ); connect (ui->actionNew, &QAction::triggered, [=](){ QMessageBox::question (this , "ques" , "是否保存" , QMessageBox::Save | QMessageBox::Cancel, QMessageBox::Cancel); }); } MainWindow::~MainWindow () { delete ui; }
结果展示:
当用户点击相应的按钮时,会产生一个int类型的返回值,用于判断用户点的是哪一个按钮。
1 2 3 4 5 6 7 8 9 10 11 12 13 14 15 16 17 18 19 20 21 22 23 24 25 26 27 28 29 30 31 #include "mainwindow.h" #include "ui_mainwindow.h" #include <QDialog> #include <QMessageBox> #include <QDebug> MainWindow::MainWindow (QWidget *parent) : QMainWindow (parent) , ui (new Ui::MainWindow) { ui->setupUi (this ); connect (ui->actionNew, &QAction::triggered, [=](){ int re = QMessageBox::question (this , "ques" , "是否保存" , QMessageBox::Save | QMessageBox::Cancel, QMessageBox::Cancel); if (re == QMessageBox::Save) { qDebug () << "Save" ; } else { qDebug () << "Cancel" ; } }); } MainWindow::~MainWindow () { delete ui; }
标准对话框 所谓标准对话框,是Qt内置的一系列对话框,用于简化开发。事实上,有很多对话框都是通用的,比如打开文件、设置颜色、打印设置等。这些对话框在所有程序中几乎相同,因此没有必要在每一个程序中都自己实现这么一个对话框。
Qt的内置对话框大致分为以下几类:
对话框
说明
QColorDialog选择颜色
QFileDialog选择文件或者目录
QFontDialog选择字体
QInputDialog允许用户输入一个值,并将其值返回
QMessageBox模态对话框,用于显示信息、询问问题等
QPageSetupDialog为打印机提供纸张相关的选项
QPrintDialog打印机配置
QPrintPreviewDialog打印预览
QProgressDialog显示操作过程
按钮组
按钮名称
说明
Push Button常用按钮
Tool Button工具按钮,用于显示图片。如果图片想要显示文字,修改风格toolButtonStyle,凸起风格是autoRaise
Radio Button单选按钮,设置默认使用ui->Btn->setChecked(true);
Check Box多选按钮,监听状态。0未选中,1半选,2选中
添加列表 Lish Widget是一种列表控件,它的每一行都是QListWidgetItem类型,因此添加时需要先声明一个变量,将其添加到控件中即可。
1 2 3 4 5 6 7 8 9 10 11 12 13 14 15 16 17 18 19 #include "widget.h" #include "ui_widget.h" Widget::Widget (QWidget *parent) : QWidget (parent) , ui (new Ui::Widget) { ui->setupUi (this ); QListWidgetItem * item = new QListWidgetItem ("锄禾日当午" ); ui->listWidget->addItem (item); } Widget::~Widget () { delete ui; }
结果展示:
设置对齐格式 使用setTextAlignment方法可以设置对应格式,里面填入的参数是对应的枚举值,具体可以查看帮助文档,例如想要设置为水平居中就可以写:
1 2 3 4 5 6 7 8 9 10 11 12 13 14 15 16 17 18 19 20 21 22 #include "widget.h" #include "ui_widget.h" Widget::Widget (QWidget *parent) : QWidget (parent) , ui (new Ui::Widget) { ui->setupUi (this ); QListWidgetItem * item = new QListWidgetItem ("锄禾日当午" ); ui->listWidget->addItem (item); item->setTextAlignment ((Qt::AlignHCenter)); } Widget::~Widget () { delete ui; }
结果展示:
添加多个列表 使用QStringList创建的列表可以将多个字符串一起放入,调用addItems即可。
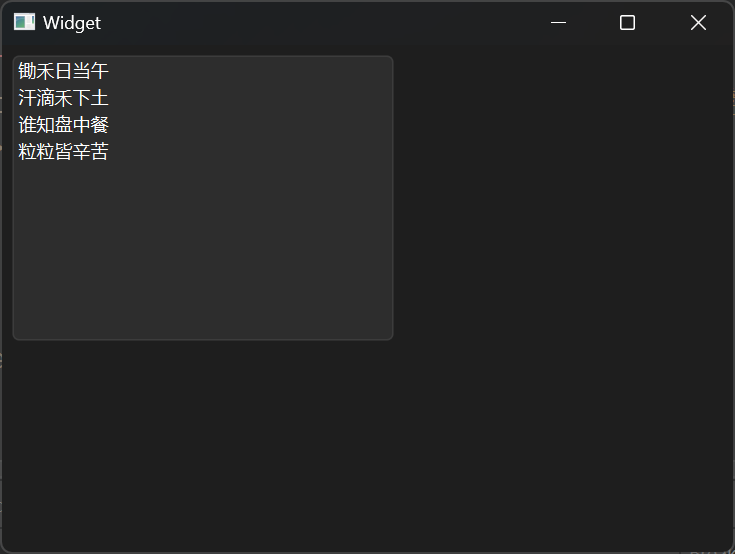
1 2 3 4 5 6 7 8 9 10 11 12 13 14 15 16 17 18 19 #include "widget.h" #include "ui_widget.h" Widget::Widget (QWidget *parent) : QWidget (parent) , ui (new Ui::Widget) { ui->setupUi (this ); QStringList list; list << "锄禾日当午" << "汗滴禾下土" << "谁知盘中餐" << "粒粒皆辛苦" ; ui->listWidget->addItems (list); } Widget::~Widget () { delete ui; }
结果展示:
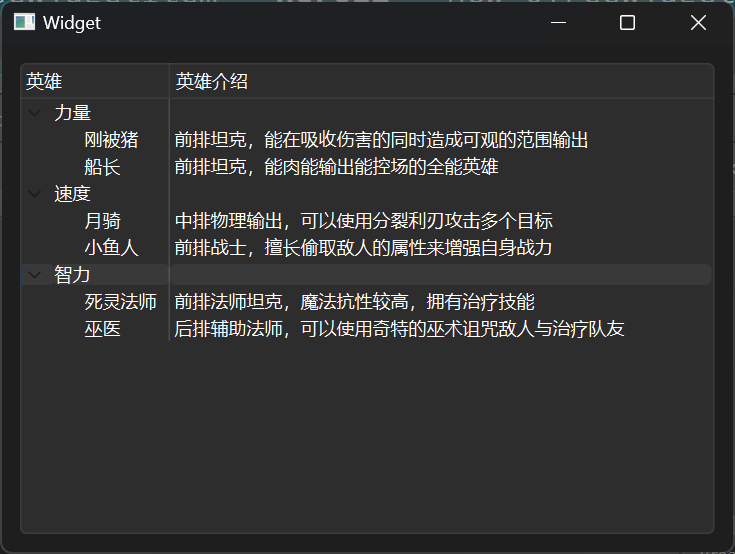
设置水平头 树控件可以制作出一个树形结构,水平头指的是每一级的标签。
1 ui->treeWidget->setHeaderLabels (QStringList () << "英雄" << "英雄介绍" );
顶层节点 顶层节点可以理解为树的根,即最顶层的分支。需要使用QTreeWidgetItem类型,声明对应数量的指针,用于设置顶层节点。
1 2 3 QTreeWidgetItem * powerItem = new QTreeWidgetItem (QStringList () << "力量" ); QTreeWidgetItem * speedItem = new QTreeWidgetItem (QStringList () << "速度" ); QTreeWidgetItem * intelligenceItem = new QTreeWidgetItem (QStringList () << "智力" );
需要在ui界面中添加顶层节点,可以使用addTopLevelItem或addTopLevelItem来实现。
1 2 3 4 ui->treeWidget->addTopLevelItem (powerItem); ui->treeWidget->addTopLevelItem (speedItem); ui->treeWidget->addTopLevelItem (intelligenceItem);
追加子节点 子节点的类型与顶层节点一样,使用addChild进行添加。
1 2 3 4 5 6 7 8 9 10 11 12 13 14 QTreeWidgetItem * heroP1 = new QTreeWidgetItem (QStringList () << "刚被猪" << "前排坦克,能在吸收伤害的同时造成可观的范围输出" ); QTreeWidgetItem * heroP2 = new QTreeWidgetItem (QStringList () << "船长" << "前排坦克,能肉能输出能控场的全能英雄" ); QTreeWidgetItem * heroS1 = new QTreeWidgetItem (QStringList () << "月骑" << "中排物理输出,可以使用分裂利刃攻击多个目标" ); QTreeWidgetItem * heroS2 = new QTreeWidgetItem (QStringList () << "小鱼人" << "前排战士,擅长偷取敌人的属性来增强自身战力" ); QTreeWidgetItem * heroI1 = new QTreeWidgetItem (QStringList () << "死灵法师" << "前排法师坦克,魔法抗性较高,拥有治疗技能" ); QTreeWidgetItem * heroI2 = new QTreeWidgetItem (QStringList () << "巫医" << "后排辅助法师,可以使用奇特的巫术诅咒敌人与治疗队友" ); powerItem->addChild (heroP1); powerItem->addChild (heroP2); speedItem->addChild (heroS1); speedItem->addChild (heroS2); intelligenceItem->addChild (heroI1); intelligenceItem->addChild (heroI2);
完整代码 1 2 3 4 5 6 7 8 9 10 11 12 13 14 15 16 17 18 19 20 21 22 23 24 25 26 27 28 29 30 31 32 33 34 35 36 37 38 39 40 41 42 43 44 #include "widget.h" #include "ui_widget.h" Widget::Widget (QWidget *parent) : QWidget (parent) , ui (new Ui::Widget) { ui->setupUi (this ); ui->treeWidget->setHeaderLabels (QStringList () << "英雄" << "英雄介绍" ); QTreeWidgetItem * powerItem = new QTreeWidgetItem (QStringList () << "力量" ); QTreeWidgetItem * speedItem = new QTreeWidgetItem (QStringList () << "速度" ); QTreeWidgetItem * intelligenceItem = new QTreeWidgetItem (QStringList () << "智力" ); ui->treeWidget->addTopLevelItem (powerItem); ui->treeWidget->addTopLevelItem (speedItem); ui->treeWidget->addTopLevelItem (intelligenceItem); QTreeWidgetItem * heroP1 = new QTreeWidgetItem (QStringList () << "刚被猪" << "前排坦克,能在吸收伤害的同时造成可观的范围输出" ); QTreeWidgetItem * heroP2 = new QTreeWidgetItem (QStringList () << "船长" << "前排坦克,能肉能输出能控场的全能英雄" ); QTreeWidgetItem * heroS1 = new QTreeWidgetItem (QStringList () << "月骑" << "中排物理输出,可以使用分裂利刃攻击多个目标" ); QTreeWidgetItem * heroS2 = new QTreeWidgetItem (QStringList () << "小鱼人" << "前排战士,擅长偷取敌人的属性来增强自身战力" ); QTreeWidgetItem * heroI1 = new QTreeWidgetItem (QStringList () << "死灵法师" << "前排法师坦克,魔法抗性较高,拥有治疗技能" ); QTreeWidgetItem * heroI2 = new QTreeWidgetItem (QStringList () << "巫医" << "后排辅助法师,可以使用奇特的巫术诅咒敌人与治疗队友" ); powerItem->addChild (heroP1); powerItem->addChild (heroP2); speedItem->addChild (heroS1); speedItem->addChild (heroS2); intelligenceItem->addChild (heroI1); intelligenceItem->addChild (heroI2); } Widget::~Widget () { delete ui; }
结果展示:
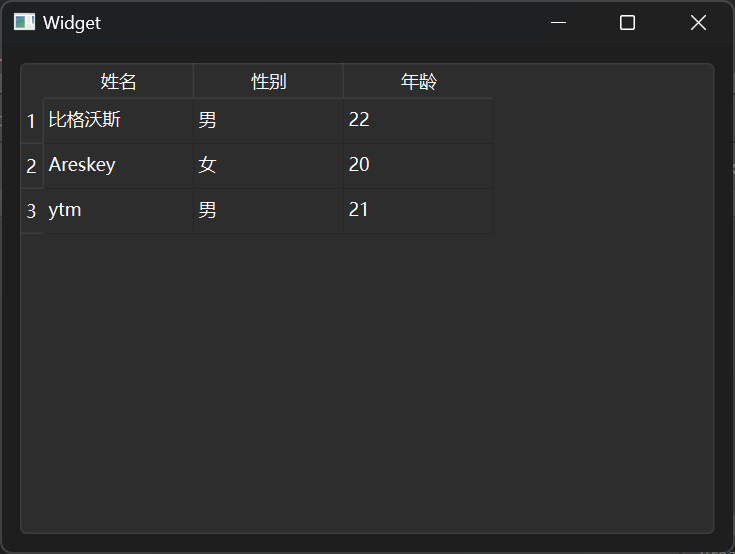
设置列数 Table Widget是一个表格,在使用之前需要先设置一下列数,通过SetColumnCount方法去设置。
1 ui->tableWidget->setColumnCount (3 );
设置水平表头 水平表头指的是每一列的标题,通过setHorizontalHeaderLabels来设置。
1 ui->tableWidget->setHorizontalHeaderLabels (QStringList () << "姓名" << "性别" << "年龄" );
设置行数 通过setRowCount设置一共有几行数据。
1 ui->tableWidget->setRowCount (3 );
设置正文 正文类似于一个二维数组,利用setItem方法去设置,前两个参数分别表示行和列,第三个参数表示填入的数据。
1 2 3 4 5 6 7 8 9 10 11 12 13 QStringList nameList; nameList << "比格沃斯" << "Areskey" << "ytm" ; QList<QString> sexList; sexList << "男" <<"女" << "男" ; QStringList ageList; ageList << "22" << "20" <<"21" ; for (int i = 0 ;i < 3 ; i++){ int col = 0 ; ui->tableWidget->setItem (i, col++, new QTableWidgetItem (nameList[i])); ui->tableWidget->setItem (i, col++, new QTableWidgetItem (sexList.at (i))); ui->tableWidget->setItem (i, col++, new QTableWidgetItem (ageList[i])); }
完整代码 1 2 3 4 5 6 7 8 9 10 11 12 13 14 15 16 17 18 19 20 21 22 23 24 25 26 27 28 29 30 31 32 33 34 35 36 37 38 39 40 41 42 #include "widget.h" #include "ui_widget.h" Widget::Widget (QWidget *parent) : QWidget (parent) , ui (new Ui::Widget) { ui->setupUi (this ); ui->tableWidget->setColumnCount (3 ); ui->tableWidget->setHorizontalHeaderLabels (QStringList () << "姓名" << "性别" << "年龄" ); ui->tableWidget->setRowCount (3 ); QStringList nameList; nameList << "比格沃斯" << "Areskey" << "ytm" ; QList<QString> sexList; sexList << "男" <<"女" << "男" ; QStringList ageList; ageList << "22" << "20" <<"21" ; for (int i = 0 ;i < 3 ; i++) { int col = 0 ; ui->tableWidget->setItem (i, col++, new QTableWidgetItem (nameList[i])); ui->tableWidget->setItem (i, col++, new QTableWidgetItem (sexList.at (i))); ui->tableWidget->setItem (i, col++, new QTableWidgetItem (ageList[i])); } } Widget::~Widget () { delete ui; }
结果展示:
其它控件 栈控件 可以添加多个页面进行切换,通过编号进行索引。
1 ui->satckedWidget->setCurrentIndex (1 );
下拉框 可以制作一个下拉框,添加元素通过addItem方法。
1 ui->comboBox->additem ("奔驰" );
显示图片 QLabel可以显示图片,使用setPixmap方法进行设置。
1 ui->lbl_Image->setPixmap (QPixmap (":/butterfly.png" ));
显示动图 动图需要保证gif格式,同样使用QLabel实现。
1 2 QMovie * movie = new QMovie (":/mario.gif" ); ui->lbl_movie->setMovie (movie);
动图还需要设置播放,使用start方法。
自定义控件封装 创建设计器界面类 在添加文件中的Qt下,有一个设计器界面类,里面有多个模板,可以选择一个进行创建。
创建好后,会出现一个新的ui界面,可以在这里设计自定义的控件。
如果想要使用自定义的控件,可以在主ui中添加一个Widget窗口,右键提升为。输入提升的类名称,即创建的自定义控件的名字,添加为全局包含,即可提升为对应的控件。
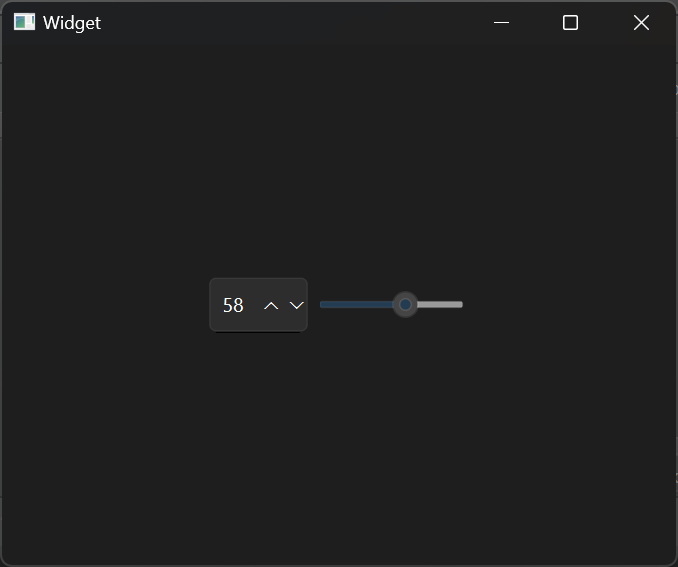
控件组合 现在设计一个自定义的控件,通过将Spin Box和Horizontal Slider组合,可以制作一个拖动滑动条进行数值调整的功能。
1 2 3 4 5 6 7 8 9 10 11 12 13 14 15 16 17 18 19 20 #include "smallwidget.h" #include "ui_smallwidget.h" SmallWidget::SmallWidget (QWidget *parent) : QWidget (parent) , ui (new Ui::SmallWidget) { ui->setupUi (this ); void (QSpinBox:: * spSignal)(int ) = &QSpinBox::valueChanged; void (QSlider:: * slSingal)(int ) = &QSlider::valueChanged; connect (ui->spinBox, spSignal, ui->horizontalSlider, &QSlider::setValue); connect (ui->horizontalSlider, slSingal, ui->spinBox, &QSpinBox::setValue); } SmallWidget::~SmallWidget () { delete ui; }
结果展示:
鼠标事件 进入和离开 可以设置一些鼠标上的事件,例如制作一个标签,当鼠标放在上面时输出“进入”,离开时输出“离开”。
自定义标签的头文件为:
1 2 3 4 5 6 7 8 9 10 11 12 13 14 15 16 17 18 19 20 21 22 #ifndef MYLABEL_H #define MYLABEL_H #include <QLabel> class MyLabel : public QLabel{ Q_OBJECT public : explicit MyLabel (QWidget *parent = nullptr ) void enterEvent (QEnterEvent *event) void leaveEvent (QEvent *) signals: }; #endif
自定义标签的源文件为:
1 2 3 4 5 6 7 8 9 10 11 12 13 14 15 16 17 18 19 20 #include "mylabel.h" #include <QDebug> MyLabel::MyLabel (QWidget *parent) : QLabel{parent} {} void MyLabel::enterEvent (QEnterEvent *event) qDebug () << "Enter" ; } void MyLabel::leaveEvent (QEvent *) qDebug () << "Leave" ; }
结果展示:
点击、释放和移动 针对点击、释放和移动也有着对应的事件,并且这些事件可以进行重写。
自定义标签的头文件为:
1 2 3 4 5 6 7 8 9 10 11 12 13 14 15 16 17 18 19 20 21 22 23 24 25 #ifndef MYLABEL_H #define MYLABEL_H #include <QLabel> #include <QMouseEvent> > class MyLabel : public QLabel{ Q_OBJECT public : explicit MyLabel (QWidget *parent = nullptr ) virtual void mousePressEvent (QMouseEvent *ev) virtual void mouseReleaseEvent (QMouseEvent *ev) virtual void mouseMoveEvent (QMouseEvent *ev) signals: }; #endif
自定义标签的源文件为:
1 2 3 4 5 6 7 8 9 10 11 12 13 14 15 16 17 18 19 20 21 22 23 24 25 26 27 28 29 #include "mylabel.h" #include <QDebug> MyLabel::MyLabel (QWidget *parent) : QLabel{parent} {} void MyLabel::mousePressEvent (QMouseEvent *ev) QString str = QString ("Press x = %1, y = %2" ).arg (ev->x ()).arg ((ev->y ())); qDebug () << str.toUtf8 ().data (); } void MyLabel::mouseReleaseEvent (QMouseEvent *ev) QString str = QString ("Release x = %1, y = %2" ).arg (ev->x ()).arg ((ev->y ())); qDebug () << str.toUtf8 ().data (); } void MyLabel::mouseMoveEvent (QMouseEvent *ev) QString str = QString ("Move x = %1, y = %2" ).arg (ev->x ()).arg ((ev->y ())); qDebug () << str.toUtf8 ().data (); }
结果展示:
1 2 3 4 5 6 7 8 9 10 Press x = 29, y = 21 Move x = 28, y = 21 Move x = 27, y = 21 Move x = 27, y = 21 Move x = 26, y = 21 Move x = 25, y = 21 Move x = 25, y = 21 Move x = 24, y = 21 Move x = 24, y = 20 Release x = 24, y = 20
在标签上按下鼠标的时候会输出坐标,滑动也会实时显示坐标,松开也同理。
还可以使用globalX和globalY来获取相对于屏幕的坐标位置。
读取按键 鼠标事件中可以通过button访问摁下的是哪一个键,LeftButton代表鼠标左键,RightButton代表鼠标右键,MiddleButton代表鼠标中键。
1 2 3 4 5 6 7 8 9 10 11 12 13 14 15 16 17 18 19 20 21 22 23 24 25 26 27 28 29 30 31 32 33 34 35 36 37 38 39 40 41 42 43 44 45 46 47 48 49 50 51 52 53 54 55 56 57 58 59 #include "mylabel.h" #include <QDebug> MyLabel::MyLabel (QWidget *parent) : QLabel{parent} {} void MyLabel::mousePressEvent (QMouseEvent *ev) if (ev->button () == Qt::LeftButton) { qDebug () << "Left Press" ; } else if (ev->button () == Qt::RightButton) { qDebug () << "Right Press" ; } else if (ev->button () == Qt::MiddleButton) { qDebug () << "Middle Press" ; } } void MyLabel::mouseReleaseEvent (QMouseEvent *ev) if (ev->button () == Qt::LeftButton) { qDebug () << "Left Release" ; } else if (ev->button () == Qt::RightButton) { qDebug () << "Right Release" ; } else if (ev->button () == Qt::MiddleButton) { qDebug () << "Middle Release" ; } } void MyLabel::mouseMoveEvent (QMouseEvent *ev) if (ev->button () == Qt::LeftButton) { qDebug () << "Left Move" ; } else if (ev->button () == Qt::RightButton) { qDebug () << "Right Move" ; } else if (ev->button () == Qt::MiddleButton) { qDebug () << "Middle Move" ; } }
结果展示:
1 2 3 4 Left Press Left Release Left Press Left Release
可以发现,上述代码中,如果按住移动鼠标并不会触发相应的输出。这是因为按下和释放都是瞬间的动作,移动是一个持续的过程,并且在移动过程中可以更换按键,导致无法识别。为了解决这一问题,可以使用buttons,可以检测所有的按键,通过位运算的&操作符来判断是否使用了对应的按键。
1 2 3 4 5 6 7 8 9 10 11 12 13 14 15 16 17 18 19 20 21 22 23 24 25 26 27 28 29 30 31 32 33 34 35 36 37 38 39 40 41 42 43 44 45 46 47 48 49 50 51 52 53 54 55 56 57 58 59 #include "mylabel.h" #include <QDebug> MyLabel::MyLabel (QWidget *parent) : QLabel{parent} {} void MyLabel::mousePressEvent (QMouseEvent *ev) if (ev->button () == Qt::LeftButton) { qDebug () << "Left Press" ; } else if (ev->button () == Qt::RightButton) { qDebug () << "Right Press" ; } else if (ev->button () == Qt::MiddleButton) { qDebug () << "Middle Press" ; } } void MyLabel::mouseReleaseEvent (QMouseEvent *ev) if (ev->button () == Qt::LeftButton) { qDebug () << "Left Release" ; } else if (ev->button () == Qt::RightButton) { qDebug () << "Right Release" ; } else if (ev->button () == Qt::MiddleButton) { qDebug () << "Middle Release" ; } } void MyLabel::mouseMoveEvent (QMouseEvent *ev) if (ev->buttons () & Qt::LeftButton) { qDebug () << "Left Move" ; } else if (ev->buttons () & Qt::RightButton) { qDebug () << "Right Move" ; } else if (ev->buttons () & Qt::MiddleButton) { qDebug () << "Middle Move" ; } }
结果展示:
1 2 3 4 5 6 7 8 9 10 11 12 13 14 Left Press Left Move Left Move Left Move Left Release Right Press Right Move Right Move Right Release Middle Press Middle Move Middle Move Middle Move Middle Release
鼠标追踪 现在的移动检测只有鼠标摁住才有效果,可以打开鼠标追踪,使用setMouseTracking即可,将值设置为true,这样就实现了移动检测。
定时器 基本方法 定时器可以用来进行计时,对应的事件是timerEvent(QTimerEvent *),可以对这个方法进行重写。
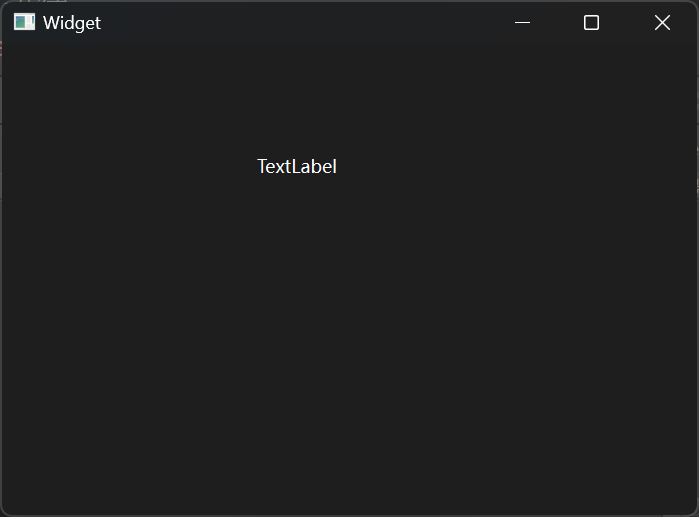
例如现在创建一个标签,内容是每隔一秒数字加一。
Widget的头文件为:
1 2 3 4 5 6 7 8 9 10 11 12 13 14 15 16 17 18 19 20 21 22 23 24 25 26 27 #ifndef WIDGET_H #define WIDGET_H #include <QWidget> QT_BEGIN_NAMESPACE namespace Ui {class Widget ;} QT_END_NAMESPACE class Widget : public QWidget{ Q_OBJECT public : Widget (QWidget *parent = nullptr ); ~Widget (); void timerEvent (QTimerEvent *) private : Ui::Widget *ui; }; #endif
Widget的源文件为:
1 2 3 4 5 6 7 8 9 10 11 12 13 14 15 16 17 18 19 20 21 22 23 24 25 #include "widget.h" #include "ui_widget.h" Widget::Widget (QWidget *parent) : QWidget (parent) , ui (new Ui::Widget) { ui->setupUi (this ); startTimer (1000 ); } Widget::~Widget () { delete ui; } void Widget::timerEvent (QTimerEvent *) static int number = 0 ; ui->timeLabel->setText (QString::number (number++)); }
启动计时器需要使用startTimer()方法,里面的参数是时间间隔,单位是毫秒。这样每过一个间隔时间都会调用一次定时器事件,为了防止每次调用都更新number值,可以将其设置为静态变量。
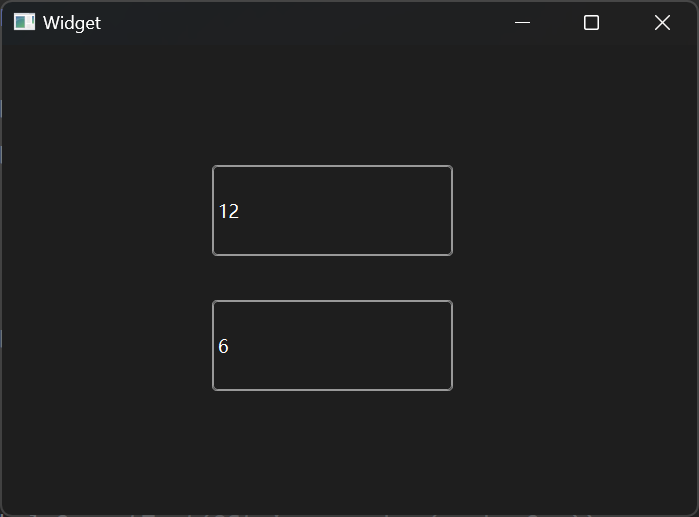
多个定时器 如果一个界面中有多个时间需求,例如一个标签每秒走一次,另一个标签每两秒走一次,就可以使用多个定时器。这里需要引入ev事件,内部有一个timerId的成员函数,可以用于区分不同的定时器。
Widget的头文件为:
1 2 3 4 5 6 7 8 9 10 11 12 13 14 15 16 17 18 19 20 21 22 23 24 25 26 27 28 29 30 #ifndef WIDGET_H #define WIDGET_H #include <QWidget> QT_BEGIN_NAMESPACE namespace Ui {class Widget ;} QT_END_NAMESPACE class Widget : public QWidget{ Q_OBJECT public : Widget (QWidget *parent = nullptr ); ~Widget (); void timerEvent (QTimerEvent * ev) private : Ui::Widget *ui; int id1; int id2; }; #endif
Widget的源文件为:
1 2 3 4 5 6 7 8 9 10 11 12 13 14 15 16 17 18 19 20 21 22 23 24 25 26 27 28 29 30 31 32 33 34 35 36 37 38 #include "widget.h" #include "ui_widget.h" Widget::Widget (QWidget *parent) : QWidget (parent) , ui (new Ui::Widget) { ui->setupUi (this ); this ->id1 = startTimer (1000 ); this ->id2 = startTimer (2000 ); ui->timeLabel_1->setText (QString::number (0 )); ui->timeLabel_2->setText (QString::number (0 )); } Widget::~Widget () { delete ui; } void Widget::timerEvent (QTimerEvent * ev) static int number1 = 1 ; static int number2 = 1 ; if (ev->timerId () == this ->id1) { ui->timeLabel_1->setText (QString::number (number1++)); } if (ev->timerId () == this ->id2) { ui->timeLabel_2->setText (QString::number (number2++)); } }
结果展示:
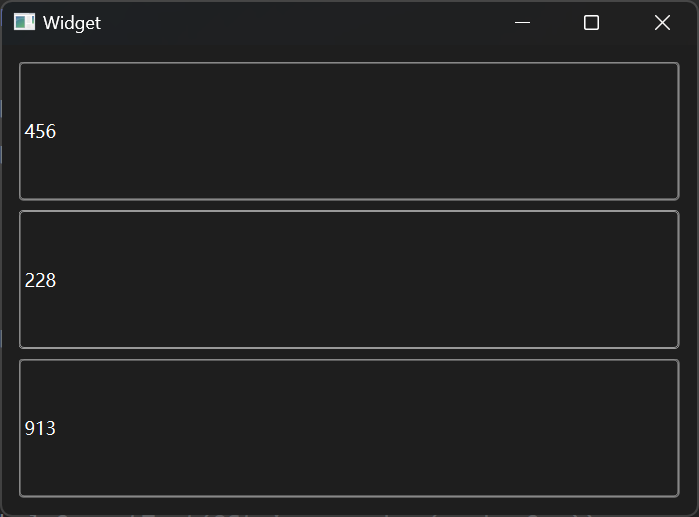
QTimer类 计时器有一个对应的类,需要引入QTimer类。通过start方法设定对应的时间间隔,使用信号与槽进行连接。
1 2 3 4 5 6 7 8 9 10 11 12 13 14 15 16 17 18 19 20 21 22 23 24 25 26 27 28 29 30 31 32 33 34 35 36 37 38 39 40 41 42 43 44 45 46 47 48 49 #include "widget.h" #include "ui_widget.h" #include <QTimer> Widget::Widget (QWidget *parent) : QWidget (parent) , ui (new Ui::Widget) { ui->setupUi (this ); this ->id1 = startTimer (1000 ); this ->id2 = startTimer (2000 ); ui->timeLabel_1->setText (QString::number (0 )); ui->timeLabel_2->setText (QString::number (0 )); ui->timeLabel_3->setText (QString::number (0 )); QTimer * timer = new QTimer (); timer->start (500 ); connect (timer, &QTimer::timeout, [=](){ static int number = 1 ; ui->timeLabel_3->setText (QString::number (number++)); }); } Widget::~Widget () { delete ui; } void Widget::timerEvent (QTimerEvent * ev) static int number1 = 1 ; static int number2 = 1 ; if (ev->timerId () == this ->id1) { ui->timeLabel_1->setText (QString::number (number1++)); } if (ev->timerId () == this ->id2) { ui->timeLabel_2->setText (QString::number (number2++)); } }
结果展示:
推荐使用QTimer类别,可以使用stop方法来随时暂停。
事件拦截 在Qt中存在一个事件分发器,用来专门处理事件。这个分发器起到一层过滤的作用,其函数名是bool event(QEvent* v),返回值是布尔类型,如果返回的是真,代表用户要处理这个事件,不向下分发事件。如果返回值是假,则向下分发事件直到成功处理这个事件。一般情况下,事件都不会去进行手动处理。
如果遇到需要进行手动处理的情况,可以重写event方法,然后将返回值设置为true,如果存在不需要处理的情况则需要返回其父类的event,让它进行处理。
1 2 3 4 5 6 7 8 9 10 11 12 13 14 15 16 17 18 19 20 21 22 23 24 25 26 27 28 29 30 31 32 33 34 35 36 37 38 39 40 41 42 43 44 45 46 47 48 49 50 51 52 53 54 55 56 57 58 59 60 61 62 #include "mylabel.h" #include <QDebug> MyLabel::MyLabel (QWidget *parent) : QLabel{parent} { } void MyLabel::mousePressEvent (QMouseEvent *ev) if (ev->button () == Qt::LeftButton) { qDebug () << "Left Press" ; } else if (ev->button () == Qt::RightButton) { qDebug () << "Right Press" ; } else if (ev->button () == Qt::MiddleButton) { qDebug () << "Middle Press" ; } } void MyLabel::mouseReleaseEvent (QMouseEvent *ev) if (ev->button () == Qt::LeftButton) { qDebug () << "Left Release" ; } else if (ev->button () == Qt::RightButton) { qDebug () << "Right Release" ; } else if (ev->button () == Qt::MiddleButton) { qDebug () << "Middle Release" ; } } void MyLabel::mouseMoveEvent (QMouseEvent *ev) qDebug () << "Move" ; } bool MyLabel::event (QEvent *e) if (e->type () == QEvent::MouseButtonPress) { qDebug () << "Event!!!" ; return true ; } return QLabel::event (e); }
结果展示:
这种情况下,左键单击事件会被拦截,除了这一事件外的事件会交给父类去进行处理。
此时还存在一个问题,QEvent是一个总的事件类,如果想要用子类的参数则无法调用,例如无法调用鼠标相关事件中的坐标函数。为了解决这一问题,可以使用静态类型转换的方式,例如想要将QEvent类型转换为QMouseEvent类型,则可以写下面这段代码。
1 QMouseEvent * ev = static_cast <QMouseEvent *>(e);
绘图 基本操作 绘图事件可以在窗口中进行绘画,需要重写绘图事件void paintEvent()。
使用时需要先声明画家对象并指定绘图设备,使用QPainter painter(this)即可。
具体操作如下所示:
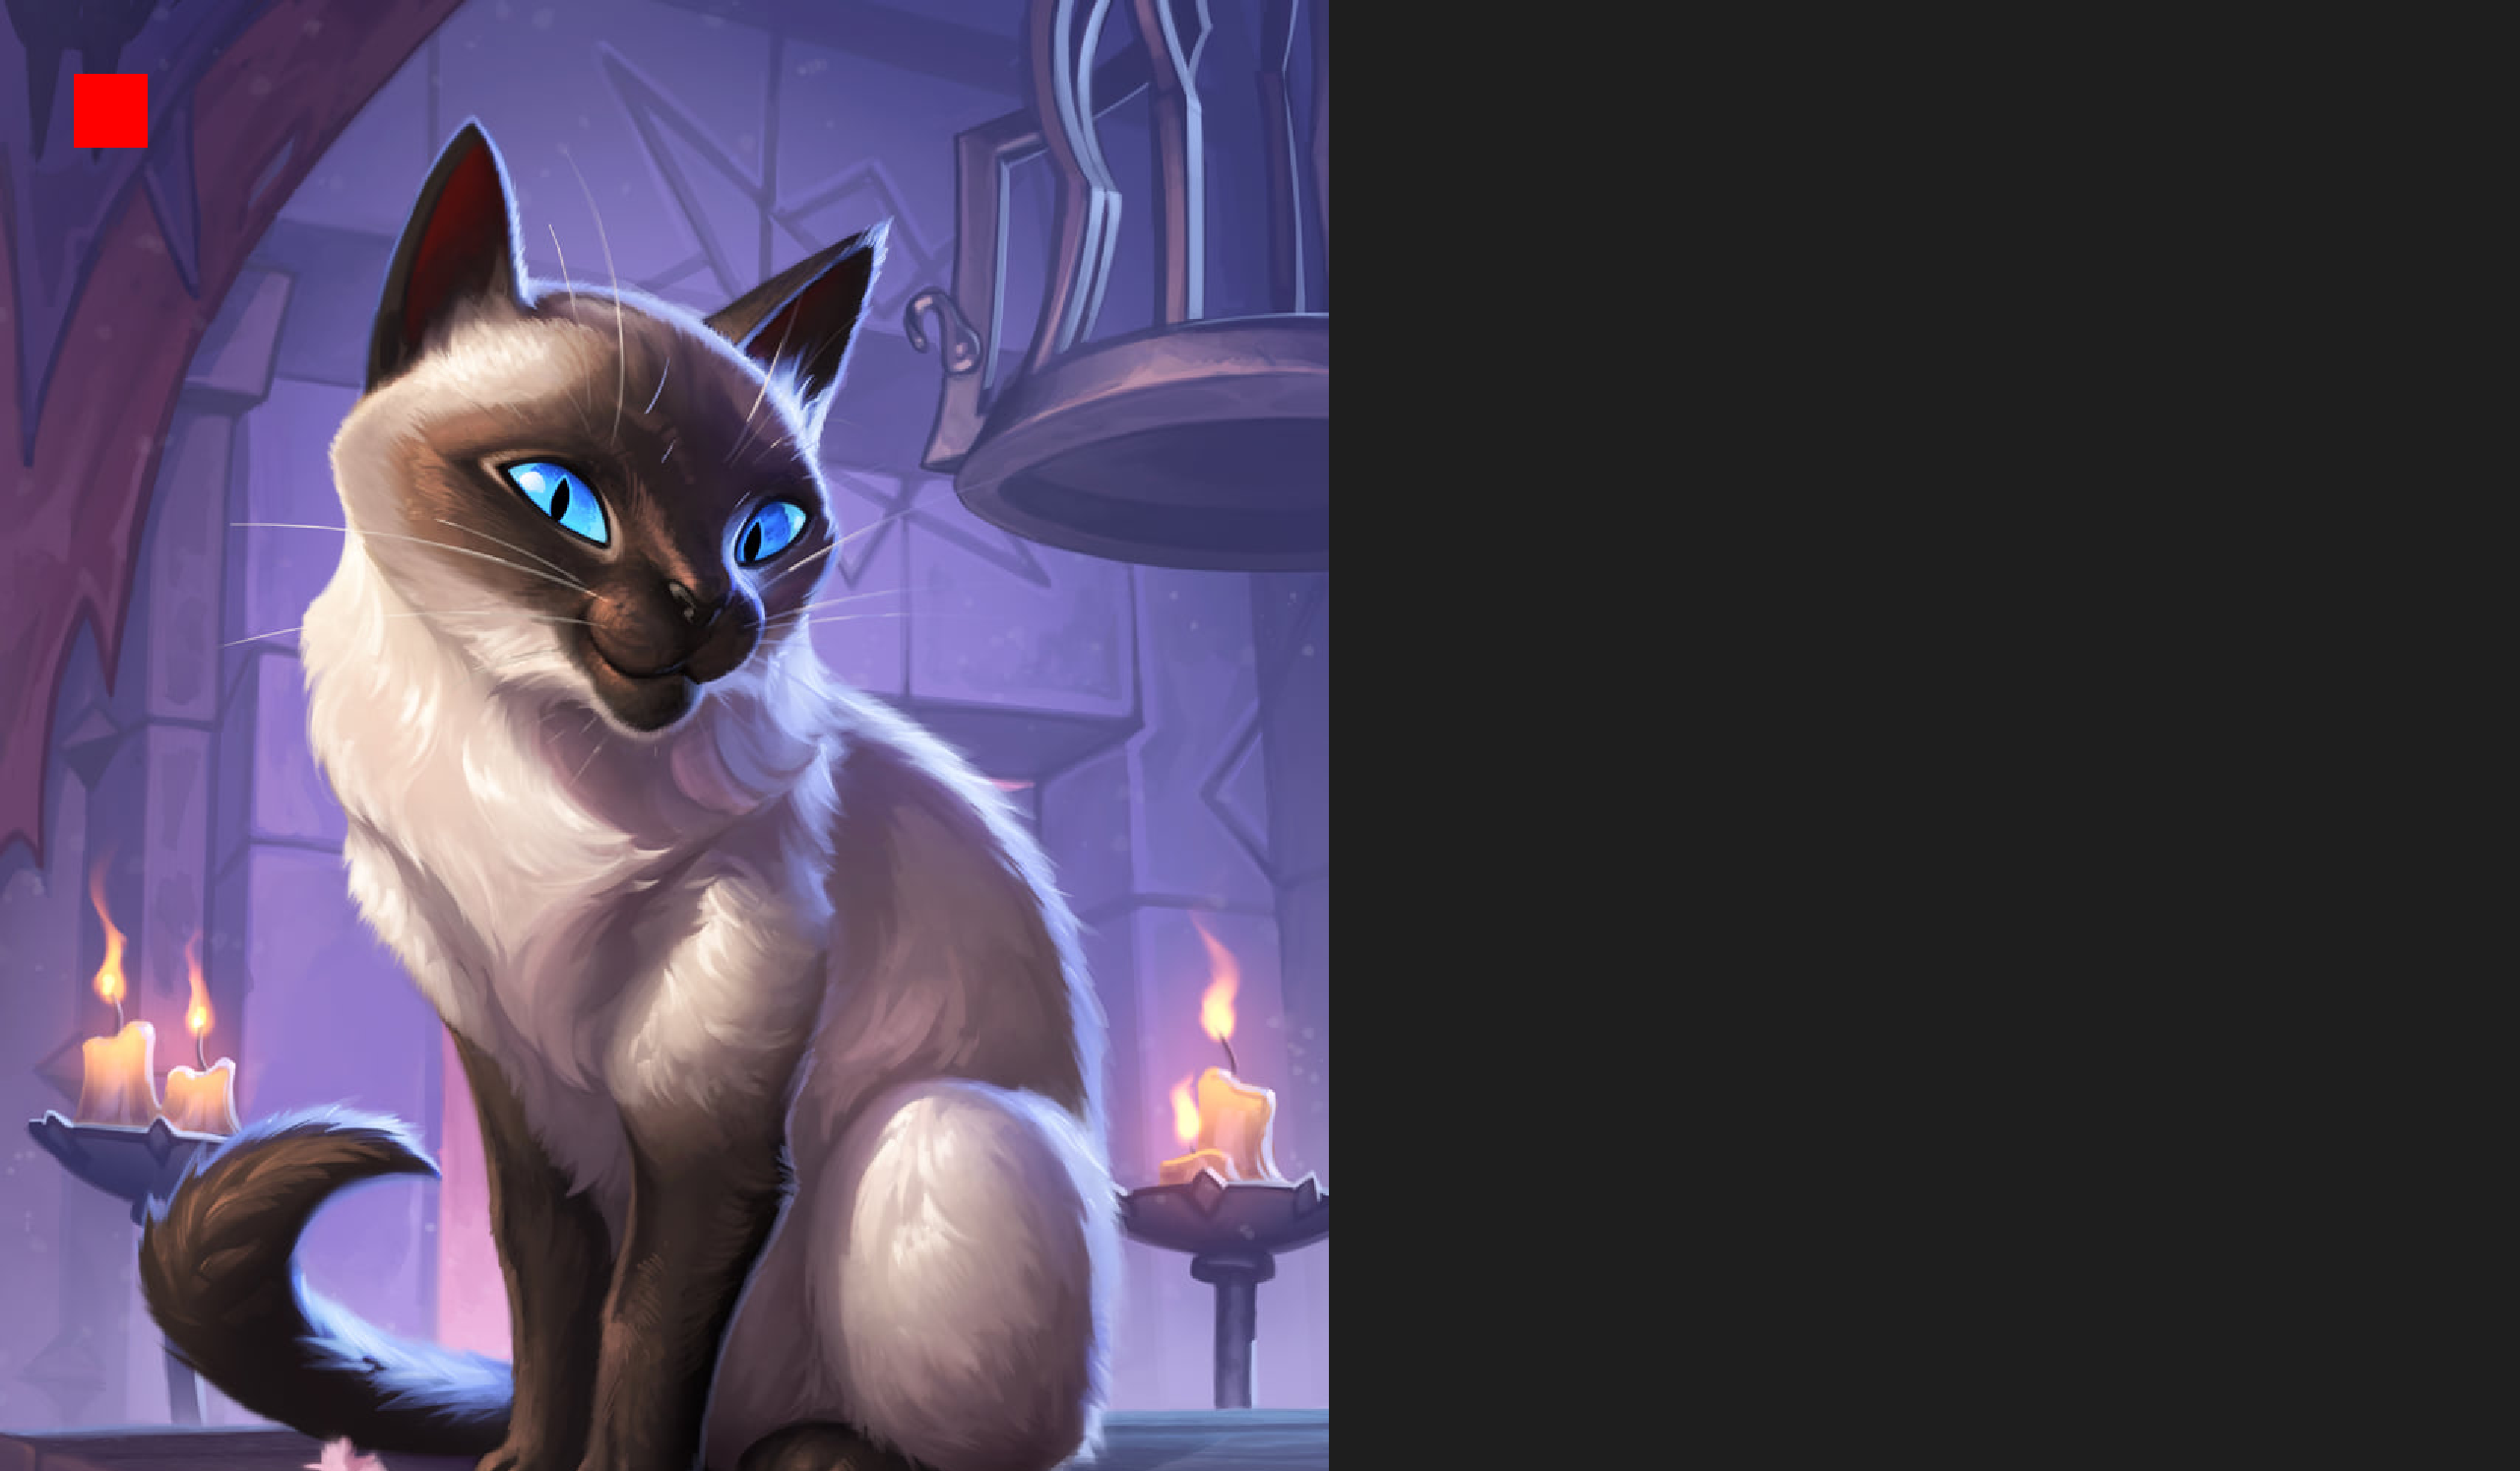
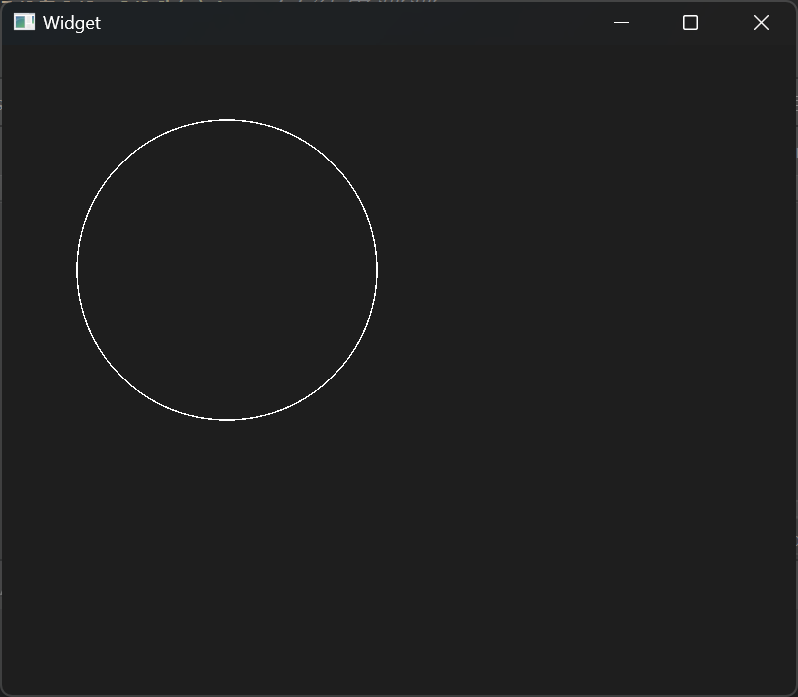
1 2 3 4 5 6 7 8 9 10 11 12 13 14 15 16 17 18 19 20 21 22 23 24 25 26 27 28 29 30 31 32 33 34 35 36 37 38 39 40 41 42 43 44 45 46 47 48 49 50 51 52 53 54 55 56 57 #include "widget.h" #include "ui_widget.h" #include <QPainter> Widget::Widget (QWidget *parent) : QWidget (parent) , ui (new Ui::Widget) { ui->setupUi (this ); } void Widget::paintEvent (QPaintEvent *) QPainter painter (this ) ; QPen pen (QColor(255 , 0 , 0 )) ; pen.setWidth (2 ); pen.setStyle (Qt::DotLine); painter.setPen (pen); QBrush brush (Qt::cyan) ; brush.setStyle (Qt::Dense7Pattern); painter.setBrush (brush); painter.drawLine (QPoint (0 , 0 ), QPoint (100 , 100 )); painter.drawEllipse (QPoint (100 , 100 ), 100 , 50 ); painter.drawRect (QRect (20 , 20 , 50 , 50 )); painter.drawText (QRect (10 , 200 , 100 , 50 ), "好耶" ); } Widget::~Widget () { delete ui; }
结果展示:
高级设置 抗锯齿 直接画出来的图像会比较粗糙,可以手动为其添加抗锯齿能力。
1 2 3 4 5 6 7 8 9 10 11 12 13 14 15 16 17 18 19 20 21 22 23 24 25 26 27 #include "widget.h" #include "ui_widget.h" #include <QPainter> Widget::Widget (QWidget *parent) : QWidget (parent) , ui (new Ui::Widget) { ui->setupUi (this ); } void Widget::paintEvent (QPaintEvent *) QPainter painter (this ) ; painter.drawEllipse (QPoint (100 , 100 ), 100 , 100 ); painter.setRenderHint (QPainter::Antialiasing); painter.drawEllipse (QPoint (300 , 100 ), 100 , 100 ); } Widget::~Widget () { delete ui; }
结果展示:
添加抗锯齿能力会让图像更加精细,但同样会降低运算速度。
移动和保存 可以通过translate方法移动画家的位置,有两个参数,分别代表横坐标和纵坐标的移动距离。还可以使用save和restore来保存和还原画家的信息。
1 2 3 4 5 6 7 8 9 10 11 12 13 14 15 16 17 18 19 20 21 22 23 24 25 26 27 28 29 30 31 32 33 34 #include "widget.h" #include "ui_widget.h" #include <QPainter> Widget::Widget (QWidget *parent) : QWidget (parent) , ui (new Ui::Widget) { ui->setupUi (this ); } void Widget::paintEvent (QPaintEvent *) QPainter painter (this ) ; painter.drawRect (QRect (20 , 20 , 50 , 50 )); painter.translate (100 , 0 ); painter.save (); painter.drawRect (QRect (20 , 20 , 50 , 50 )); painter.translate (100 , 0 ); painter.restore (); painter.drawRect (QRect (20 , 20 , 50 , 50 )); } Widget::~Widget () { delete ui; }
结果展示:
调用绘图事件 绘图也可以绘制资源文件中有的图片,如果想要重新调用绘图事件可以使用update方法进行调用。
1 2 3 4 5 6 7 8 9 10 11 12 13 14 15 16 17 18 19 20 21 22 23 24 25 26 27 28 29 #include "widget.h" #include "ui_widget.h" #include <QPainter> Widget::Widget (QWidget *parent) : QWidget (parent) , ui (new Ui::Widget) { ui->setupUi (this ); connect (ui->pushButton, &QPushButton::clicked, [=](){ update (); }); } void Widget::paintEvent (QPaintEvent *) QPainter painter (this ) ; painter.drawPixmap (this ->posX, 0 , QPixmap (":/avatar.jpg" )); this ->posX += 10 ; } Widget::~Widget () { delete ui; }
结果展示:
绘图设备 绘图设备是指继承QPaintDevice的子类。Qt一共提供了四个这样的类,分别是Qpixmap、QBitmap、QImage和QPicture。其中:
Pixmap专门为图像在屏幕上的显示做了优化。QBitmap是QPixmap的一个子类,它的色深限定为1,可以使用QPixmap的isQBitmap()函数来确定这个QPixmap是不是一个QBitmap。QImage专门为图像的像素级访问做了优化。QPicture则可以记录和重现QPainter的各条命令。
Pixmap 使用Pixmap可以直接创建一个绘图设备,让Painter在上面进行绘画,保存在相应的路径下。
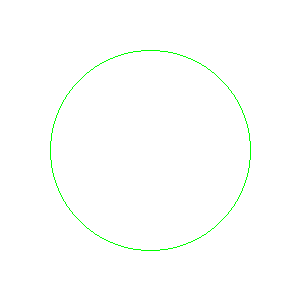
1 2 3 4 5 6 7 8 9 10 11 12 13 14 15 16 17 18 19 20 21 22 23 24 25 26 27 28 29 30 31 32 #include "widget.h" #include "ui_widget.h" #include <QPixmap> #include <QPainter> Widget::Widget (QWidget *parent) : QWidget (parent) , ui (new Ui::Widget) { ui->setupUi (this ); QPixmap pix (300 , 300 ) ; pix.fill (Qt::white); QPainter painter (&pix) ; painter.setPen (QPen (Qt::green)); painter.drawEllipse (QPoint (150 , 150 ), 100 , 100 ); pix.save (("D:\\Code\\Qt\\Workspace\\pix.png" )); } Widget::~Widget () { delete ui; }
结果展示:
QImage 相对于Pixmap而言,QImage多了一个格式参数,可以设定绘图设备的一些格式,最常用的格式是QImage::Format_RGB32。
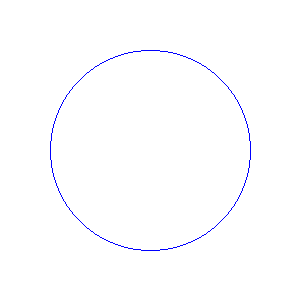
1 2 3 4 5 6 7 8 9 10 11 12 13 14 15 16 17 18 19 20 21 22 23 24 25 26 27 28 #include "widget.h" #include "ui_widget.h" #include <QImage> #include <QPainter> Widget::Widget (QWidget *parent) : QWidget (parent) , ui (new Ui::Widget) { ui->setupUi (this ); QImage img (300 , 300 , QImage::Format_RGB32) ; img.fill (Qt::white); QPainter painter (&img) ; painter.setPen (QPen (Qt::blue)); painter.drawEllipse (QPoint (150 , 150 ), 100 , 100 ); img.save ("D:\\Code\\Qt\\Workspace\\image.png" ); } Widget::~Widget () { delete ui; }
结果展示:
除了可以绘制图片外,还可以修改像素点。
1 2 3 4 5 6 7 8 9 10 11 12 13 14 15 16 17 18 19 20 21 22 23 24 25 26 27 28 29 30 31 32 33 34 35 36 37 38 39 40 #include "widget.h" #include "ui_widget.h" #include <QImage> #include <QPainter> Widget::Widget (QWidget *parent) : QWidget (parent) , ui (new Ui::Widget) { ui->setupUi (this ); } Widget::~Widget () { delete ui; } void Widget::paintEvent (QPaintEvent *) QPainter painter (this ) ; QImage img; img.load (":/avatar.jpg" ); for (int i = 50 ; i < 100 ; i++) { for (int j = 50 ; j < 100 ; j++) { QRgb value = qRgb (255 , 0 , 0 ); img.setPixel (i, j ,value); } } painter.drawImage (0 , 0 , img); }
结果展示:
QPicture QPicture可以自定义一种类型的文件对绘图命令进行保存然后重现。
1 2 3 4 5 6 7 8 9 10 11 12 13 14 15 16 17 18 19 20 21 22 23 24 25 26 27 28 29 30 31 32 33 34 35 36 37 38 #include "widget.h" #include "ui_widget.h" #include <QPicture> #include <QPainter> Widget::Widget (QWidget *parent) : QWidget (parent) , ui (new Ui::Widget) { ui->setupUi (this ); QPicture pic; QPainter painter; painter.begin (&pic); painter.drawEllipse (QPoint (150 , 150 ), 100 , 100 ); painter.end (); pic.save ("D:\\Code\\Qt\\Workspace\\pic.bigglesworth" ); } Widget::~Widget () { delete ui; } void Widget::paintEvent (QPaintEvent *) QPainter painter (this ) ; QPicture pic; pic.load ("D:\\Code\\Qt\\Workspace\\pic.bigglesworth" ); painter.drawPicture (0 , 0 , pic); }
结果展示:
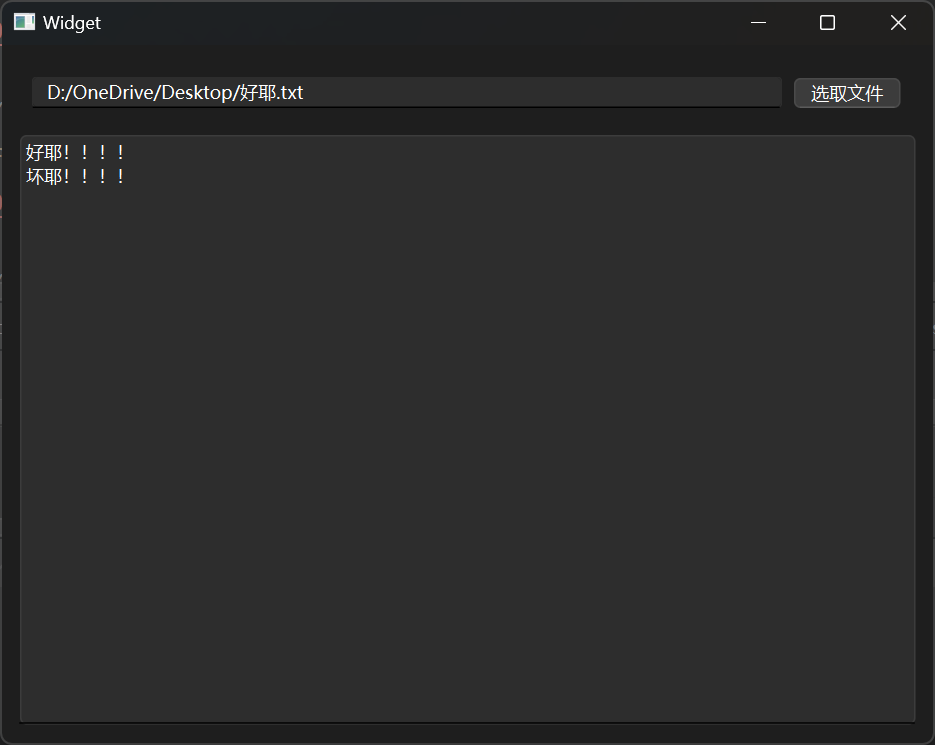
文件读写 文件读取 文件相关的操作需要使用QFile头文件,现在设计一个窗口,可以选择文本文件进行读取。
1 2 3 4 5 6 7 8 9 10 11 12 13 14 15 16 17 18 19 20 21 22 23 24 25 26 27 28 29 30 31 32 33 34 35 36 #include "widget.h" #include "ui_widget.h" #include <QFileDialog> #include <QFile> Widget::Widget (QWidget *parent) : QWidget (parent) , ui (new Ui::Widget) { ui->setupUi (this ); connect (ui->pushButton, &QPushButton::clicked, [=](){ QString path = QFileDialog::getOpenFileName (this , "打开文件" , "D:\\OneDrive\\Desktop" ); ui->lineEdit->setText (path); QFile file (path); file.open (QIODevice::ReadOnly); QByteArray array = file.readAll (); ui->textEdit->setText (array); }); } Widget::~Widget () { delete ui; }
结果展示:
不仅可以读取整个文件,还可以使用readLine按行进行读取,通过atEnd判断是否读完。
1 2 3 4 5 6 7 8 9 10 11 12 13 14 15 16 17 18 19 20 21 22 23 24 25 26 27 28 29 30 31 32 33 34 35 36 37 38 39 40 #include "widget.h" #include "ui_widget.h" #include <QFileDialog> #include <QFile> Widget::Widget (QWidget *parent) : QWidget (parent) , ui (new Ui::Widget) { ui->setupUi (this ); connect (ui->pushButton, &QPushButton::clicked, [=](){ QString path = QFileDialog::getOpenFileName (this , "打开文件" , "D:\\OneDrive\\Desktop" ); ui->lineEdit->setText (path); QFile file (path); file.open (QIODevice::ReadOnly); QByteArray array; while (!file.atEnd ()) { array += file.readLine (); } ui->textEdit->setText (array); }); } Widget::~Widget () { delete ui; }
结果展示:
使用完文件后,需要使用close函数进行关闭。
追加写入 使用Append的打开方式可以对其进行追加写入。
1 2 3 4 5 6 7 8 9 10 11 12 13 14 15 16 17 18 19 20 21 22 23 24 25 26 27 28 29 30 31 32 33 #include "widget.h" #include "ui_widget.h" #include <QFileDialog> #include <QFile> Widget::Widget (QWidget *parent) : QWidget (parent) , ui (new Ui::Widget) { ui->setupUi (this ); connect (ui->pushButton, &QPushButton::clicked, [=](){ QString path = QFileDialog::getOpenFileName (this , "打开文件" , "D:\\OneDrive\\Desktop" ); ui->lineEdit->setText (path); QFile file (path); file.open (QIODevice::Append); file.write ("好坏耶!!!!" ); file.close (); }); } Widget::~Widget () { delete ui; }
文件信息 文件除了存储的信息外还有非常多的其余信息,例如创建时间,字数等等,可以通过QFileInfo文件信息类进行读取。
1 2 3 4 5 6 7 8 9 10 11 12 13 14 15 16 17 18 19 20 21 22 23 24 25 26 27 28 29 30 31 32 33 34 35 36 37 #include "widget.h" #include "ui_widget.h" #include <QFileDialog> #include <QFile> #include <QFileInfo> #include <QDebug> Widget::Widget (QWidget *parent) : QWidget (parent) , ui (new Ui::Widget) { ui->setupUi (this ); connect (ui->pushButton, &QPushButton::clicked, [=](){ QString path = QFileDialog::getOpenFileName (this , "打开文件" , "D:\\OneDrive\\Desktop" ); ui->lineEdit->setText (path); QFile file (path); QFileInfo info (path); qDebug () << "Size:" << info.size () << "Suffix:" << info.suffix () << "File Name:" << info.fileName (); file.close (); }); } Widget::~Widget () { delete ui; }
结果展示:
1 Size: 59 Suffix: "txt" File Name: "好耶.txt"
还可以用这种方式显示创建日期和修改日期。
1 2 3 4 5 6 7 8 9 10 11 12 13 14 15 16 17 18 19 20 21 22 23 24 25 26 27 28 29 30 31 32 33 34 35 36 37 38 39 #include "widget.h" #include "ui_widget.h" #include <QFileDialog> #include <QFile> #include <QFileInfo> #include <QDebug> #include <QDateTime> Widget::Widget (QWidget *parent) : QWidget (parent) , ui (new Ui::Widget) { ui->setupUi (this ); connect (ui->pushButton, &QPushButton::clicked, [=](){ QString path = QFileDialog::getOpenFileName (this , "打开文件" , "D:\\OneDrive\\Desktop" ); ui->lineEdit->setText (path); QFile file (path); QFileInfo info (path); qDebug () << "Birth Time:" << info.birthTime ().toString ("yyyy/MM/dd hh:mm:ss" ); qDebug () << "Last Modified:" << info.lastModified ().toString ("yyyy/MM/dd hh:mm:ss" ); file.close (); }); } Widget::~Widget () { delete ui; }
结果展示:
1 2 Birth Time: "2024/06/29 19:08:15" Last Modified: "2024/06/29 23:00:54"


 微信
微信 支付宝
支付宝